Hello All,
In this tutorial i will show you laravel 8 mobile number OTP authentication using firebase, There are many types of autentication to login different sites and application so, here we will see mobile number otp authentication.
We can use firebase otp authentication to sign in a user by sending an otp message to the user's phone and after firebase otp verification user can login respective website or application so, let's start otp authentication using firebase in laravel 8 step by step
Step 1 : Create Firebase Project for Laravel 8 Mobile Number OTP Authentication using Firebase
Step 2 : Install Laravel 8
Step 3 : Create Route
Step 4 : Create Controller
Step 5 : Create Blade File
First of all we will login into Firebase Console and create new project for laravel 8 firebase phone authentication. After that you need to store app id and another details to add in blade file.
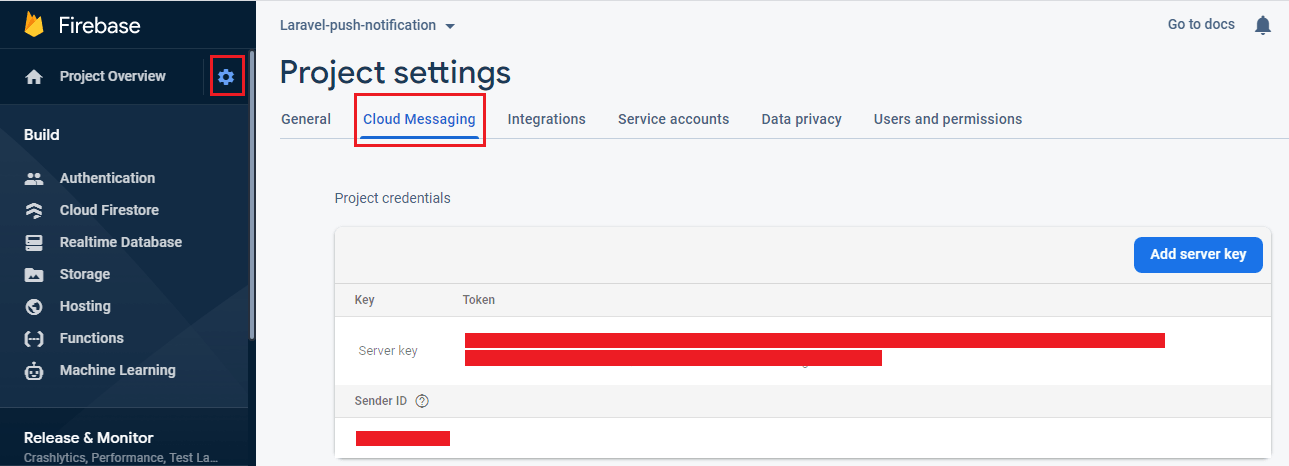
Now we need to enable authentication firebase otp authentication to sign in method as shown in below images.
Step 2 : Install Laravel 8
Now install new application for firebase otp auth example using below command
composer create-project --prefer-dist laravel/laravel Firebase_OTP_Auth_ExampleStep 3 : Create Route
Now we will add new routes to display login page in laravel so, copy below code in your routes/web.php file
Route::get('firebase_otp_verification', [HomeController::class, 'otpVerification']);Step 4 : Create Controller
Here, I have created HomeController and added below code.
<?php

namespace App\Http\Controllers;

use Illuminate\Http\Request;
use App\Models\User;

class HomeController extends Controller
{

    public function __construct()
    {
        $this->middleware('auth');
    }


     public function otpVerification()
    {
        return view('home');
    }
}
Step 5 : Create Blade File
Now, you need to create home.blade.php file and add below code.
<html>
    <head>
        <title>Laravel 8 Mobile Number (OTP) Authentication using Firebase - websolutionstuff.com</title>
        <link href="https://cdn.jsdelivr.net/npm/[email protected]/dist/css/bootstrap.min.css" rel="stylesheet">
        <script src="https://cdnjs.cloudflare.com/ajax/libs/jquery/3.6.0/jquery.min.js"></script>
    </head>
<body>
<div class="container">
    <h3 style="margin-top: 30px;">Laravel 8 Mobile Number (OTP) Authentication using Firebase - websolutionstuff.com</h3><br>
    <div class="alert alert-danger" id="error" style="display: none;"></div>
    <div class="card">
      <div class="card-header">
        Enter Phone Number
      </div>
      <div class="card-body">
        <div class="alert alert-success" id="sentSuccess" style="display: none;"></div>
        <form>
            <label>Phone Number:</label>
            <input type="text" id="number" class="form-control" placeholder="+91 9876543210"><br>
            <div id="recaptcha-container"></div><br>
            <button type="button" class="btn btn-success" onclick="SendCode();">Send Code</button>
        </form>
      </div>
    </div>

    <div class="card" style="margin-top: 10px">
      <div class="card-header">
        Enter Verification code
      </div>
      <div class="card-body">
        <div class="alert alert-success" id="successRegsiter" style="display: none;"></div>
        <form>
            <input type="text" id="verificationCode" class="form-control" placeholder="Enter Verification Code"><br>
            <button type="button" class="btn btn-success" onclick="VerifyCode();">Verify Code</button>
        </form>
      </div>
    </div>

</div>

<script src="https://www.gstatic.com/firebasejs/6.0.2/firebase.js"></script>

<script>

  var firebaseConfig = {
    apiKey: "XXXX",
    authDomain: "XXXX.firebaseapp.com",
    databaseURL: "XXXX.firebaseio.com",
    projectId: "XXXX",
    storageBucket: "XXXX.appspot.com",
    messagingSenderId: "XXXX",
    appId: "XXXX",
    measurementId: "XXXX"
  };

  firebase.initializeApp(firebaseConfig);
</script>

<script type="text/javascript">

    window.onload=function () {
      render();
    };

    function render() {
        window.recaptchaVerifier=new firebase.auth.RecaptchaVerifier('recaptcha-container');
        recaptchaVerifier.render();
    }

    function SendCode() {

        var number = $("#number").val();

        firebase.auth().signInWithPhoneNumber(number,window.recaptchaVerifier).then(function (confirmationResult) {

            window.confirmationResult=confirmationResult;
            coderesult=confirmationResult;

            $("#sentSuccess").text("Message Sent Successfully.");
            $("#sentSuccess").show();

        }).catch(function (error) {
            $("#error").text(error.message);
            $("#error").show();
        });

    }

    function VerifyCode() {

        var code = $("#verificationCode").val();

        coderesult.confirm(code).then(function (result) {
            var user=result.user;

            $("#successRegsiter").text("You Are Register Successfully.");
            $("#successRegsiter").show();

        }).catch(function (error) {
            $("#error").text(error.message);
            $("#error").show();
        });
    }

</script>

</body>
</html>
Output :
And after that you will get output like below image.