In this article, we will see how to create a multi language website in laravel 9. In this example, we will see the laravel multilingual website. If you are looking for multi language support website in laravel 9 then It helps you how to add multiple language in laravel 9. we will use laravel trans() to create a multilingual language website.
So, let's see laravel 9 create multi language website, how to create multi language website in PHP, laravel 9 localization, change the website language dynamically in laravel 9, multi language website in laravel 9.
Laravel's localization features provide a convenient way to retrieve text in different languages, allowing you to easily support multiple languages within your application. So, here we will show you how to create localization or laravel dynamic language.
In this step, we will create laravel 9 application using the below command.
composer create-project --prefer-dist laravel/laravel blogIn this step, we will create a localization file language-wise. here I create two files first one for English and the second one in Chinese. And just copy and paste the below code in the given path and write down your custom message or value.
resources/lang/en/message.php
<?php

return [
    'welcome' => 'This is a welcome message !',
];
resources/lang/zhh/message.php
<?php

return [
    'welcome' => '这是一个欢迎信息 !',
];
In this step, we will create two routes for displaying the view page with language dropdown and message and another for changing languages using jquery.
Now, add the below route in your routes/web.php file.
Route::get('index', '[email protected]');
Route::get('change/lang', '[email protected]_change')->name('LangChange');In this step, now we create a controller name as a LocalizationController. This controller helps to manage layouts and change language dynamically using the dropdown.
Copy the below code in your terminal to create a new controller.
php artisan make:controller LocalizationControllerNow, add the below code in your LocalizationController.
<?php

namespace App\Http\Controllers;

use Illuminate\Http\Request;
use App;

class LocalizationController extends Controller
{

    public function index()
    {
        return view('welcome');
    }

    public function lang_change(Request $request)
    {
        App::setLocale($request->lang);
        session()->put('locale', $request->lang);
        return view('welcome');
    }
}
In this step, we will create a blade file to view our output.
<!DOCTYPE html>
<html>
<head>
    <title>How To Create Multi Language Website In Laravel 9 - websolutionstuff.com</title>
    <meta charset="utf-8">
    <meta http-equiv="X-UA-Compatible" content="IE=edge">
    <meta name="viewport" content="width=device-width, initial-scale=1">
    <link href="https://cdnjs.cloudflare.com/ajax/libs/twitter-bootstrap/4.0.0-alpha/css/bootstrap.css" rel="stylesheet">
    <script src="https://ajax.googleapis.com/ajax/libs/jquery/3.5.1/jquery.min.js"></script>
</head>
<body>
    <div class="container">
        <div class="row" style="text-align: center;margin-top: 40px;">
            <h2>How To Create Multi Language Website In Laravel 9 - websolutionstuff.com</h2><br>
            <div class="col-md-2 col-md-offset-3 text-right">
                <strong>Select Language: </strong>
            </div>
            <div class="col-md-4">
                <select class="form-control Langchange">
                    <option value="en" {{ session()->get('locale') == 'en' ? 'selected' : '' }}>English</option>
                    <option value="zhh" {{ session()->get('locale') == 'zhh' ? 'selected' : '' }}>Chinese</option>
                </select>
            </div>
            <h1 style="margin-top: 80px;">{{ __('message.welcome') }}</h1>
        </div>
    </div>
</body>

<script type="text/javascript">
    var url = "{{ route('LangChange') }}";
    $(".Langchange").change(function(){
        window.location.href = url + "?lang="+ $(this).val();
    });
</script>
</html>
Here you can display strings or messages using different ways in laravel 9.
- trans()
- @lang()
- __()
- @json(__())
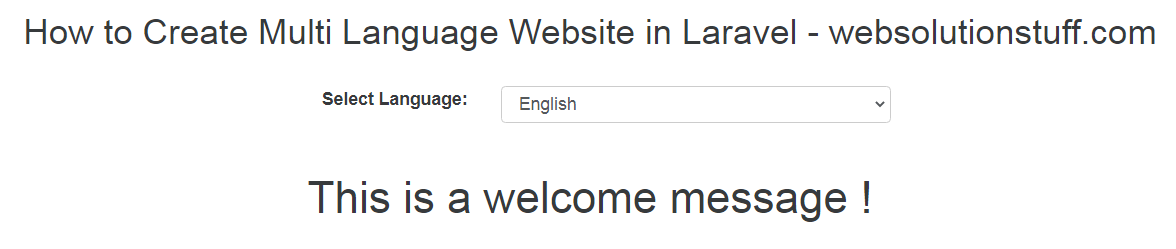
Run this example in your browser and get output like the below screenshot.
Output:
English Language
Chinese Language
You might also like :
- Read Also: 500 Internal Server Error In Laravel 9 AJAX
- Read Also: Laravel 9 User Roles and Permissions Without Package
- Read Also: Laravel 9 One To Many Polymorphic Relationship
- Read Also: Laravel 9 One To Many Relationship Example