In this tutorial I will teach you about Google Recaptcha, Google Recaptcha is used for advanced risk analysis techniques to show humans and bots apart. that defends your site from spam and abuse. And it makes your site more secure. For this tutorial, we are using anhskohbo/no-captcha package. And most important we need a secret key and site key from Google API.
So, let's see the google recaptcha example in laravel 7/8, google captcha in laravel 8, how to add google recaptcha in laravel, laravel 8 google recaptcha v2 example, google API integration in laravel, set up google recaptcha v2.
Step 1 : Install Laravel
Type the following command in the terminal for creating a fresh project in your system.
composer create-project --prefer-dist laravel/laravel recaptchaStep 2 : Install anhskohbo/no-captcha Package In Your Application
After installation of the project, we need to install anhskohbo/no-captcha Package for our demo
composer require anhskohbo/no-captchaStep 3 : Publish Config File
This package supports the auto-discovery feature of Laravel 5.5+, Type the below command to Publish Config File
php artisan vendor:publish --provider="Anhskohbo\NoCaptcha\NoCaptchaServiceProvider"Step 4: Add Google Site Key and Secret Key
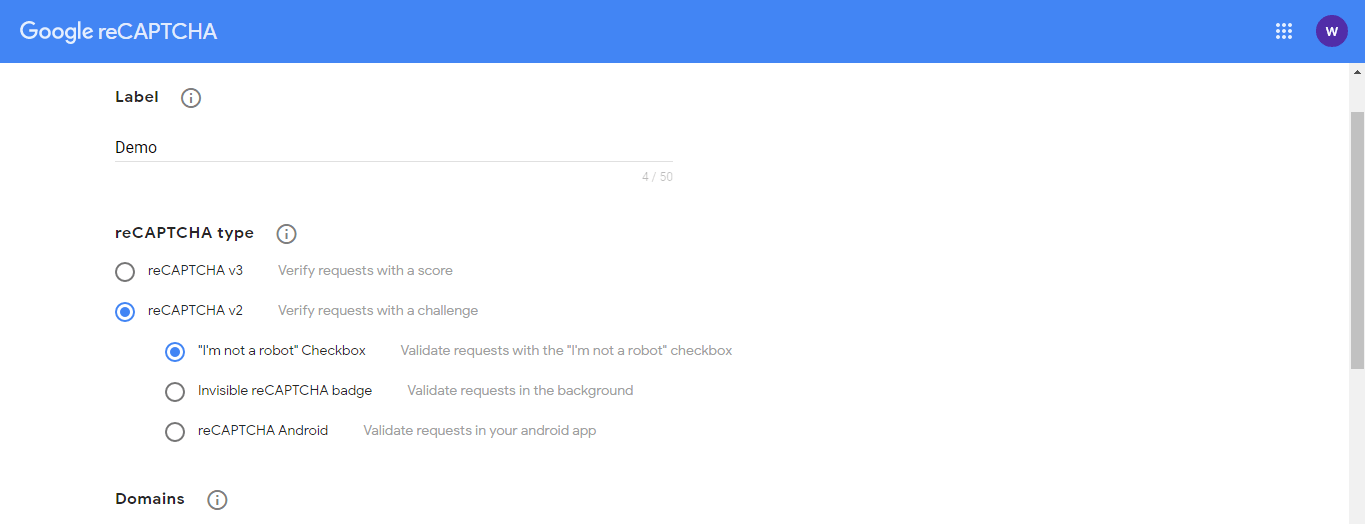
After that, we need to add Google Site Key and Secret Key in the .env file, if you don't have these keys then you need to create them from google's website
Click here to create a new site key and secret key: Generate Recaptcha
After that open the .env file and add these keys.
NOCAPTCHA_SECRET=XXXXXX
NOCAPTCHA_SITEKEY=XXXXXStep 5 : Create Controller
Now create a controller on this path app\Http\Controllers\UserController.php and add the below command.
And also we put validation for fields and captcha, if anyone is failed then it will display error messages.
<?php

namespace App\Http\Controllers;

use Illuminate\Http\Request;
use App\User;

class UserController extends Controller
{

    public function create()
    {
        return view('users.create');
    }

    public function store(Request $request)
    {
        $request->validate([
            'name' => 'required',
            'email' => 'required|email',
            'g-recaptcha-response' => 'required|captcha',
        ]);

        User::create($request->all());

        return "Success";
    }
}
Step 6 : Add Route
We need to add a route for the details view file.
Route::resource('users','UserController');Step 7 : Create Blade File
Now, create.blade.php file in this path resources\views\create.blade.php and add the below HTML code.
<html>
<head>
   <title>Recaptcha code example - websolutionstuff.com</title>
   <link rel="stylesheet" href="https://maxcdn.bootstrapcdn.com/bootstrap/3.3.7/css/bootstrap.min.css">
   <script src="https://ajax.googleapis.com/ajax/libs/jquery/3.5.1/jquery.min.js"></script>

</head>
<body>

   <div class="container">

      <div class="row" style="margin-top: 10px;">
         <div class="col-lg-12 margin-tb">
            <div class="text-center">
               <h2>Create New User</h2>
            </div>
         </div>
      </div>

      @if ($errors->any())
      <div class="alert alert-danger">
         <strong>Error!</strong> <br>
         <ul>
            @foreach ($errors->all() as $error)
            <li>{{ $error }}</li>
            @endforeach
         </ul>
      </div>
      @endif

      <form action="{{ route('users.store') }}" method="POST">
         @csrf
         <div style="margin-left: 400px;">
            <div class="row">
               <div class="col-xs-12 col-sm-12 col-md-6">
                  <div class="form-group">
                     <strong>Name:</strong>
                     <input type="text" name="name" class="form-control" placeholder="Name">
                  </div>
               </div>
            </div>
            <div class="row">
               <div class="col-xs-12 col-sm-12 col-md-6">
                  <div class="form-group">
                     <strong>Email:</strong>
                     <input type="email" name="email" class="form-control" placeholder="Email">
                  </div>
               </div>
            </div>
            <div class="row">
               <div class="col-xs-12 col-sm-12 col-md-6">
                  <div class="form-group">
                     <strong>Recaptcha:</strong>
                     {!! NoCaptcha::renderJs() !!}
                     {!! NoCaptcha::display() !!}
                  </div>
               </div>
            </div>
            <div class="row">
               <div class="col-xs-12 col-sm-12 col-md-12 text-left">
                  <button type="submit" class="btn btn-primary">Submit</button>
               </div>
            </div>
         </div>
      </form>
   </div>
</body>
</html>And finally, you will get output like the below screen print.
And if you will not enter any value in this box then you will get error messages.
You might also like:
- Read Also: Google Map With Draggable Marker Example
- Read Also: Laravel 8 Google Bar Chart Example
- Read Also: Laravel 8 Google Pie Chart Example
- Read Also: Laravel 9 CRUD Operation Example