In this article, we will see how to validate the ajax form in laravel 10. Here we will learn about the laravel 10 ajax form validation example. Simply we will create a bootstrap modal. In this modal, we will create a form with basic inputs. when the form is submitted we will check validation without page refresh.
When we need to require without page refresh form submits with validation you can use this tutorial. In this example, using ajax call we will submit the form and validate the form in laravel 10.
So, let's see the laravel 10 ajax form validation example, laravel 10 ajax form submit with validation, laravel 10 ajax form submit, and how to validate the ajax form using jquery.
In this step, we will install laravel 10 using the following command.
composer create-project laravel/laravel laravel_10_ajax_form_validationNow, we will create a model and migration using the following command.
php artisan make:migration create_users_tableMigration:
<?php

use Illuminate\Database\Migrations\Migration;
use Illuminate\Database\Schema\Blueprint;
use Illuminate\Support\Facades\Schema;

class CreateUsersTable extends Migration
{
    /**
     * Run the migrations.
     *
     * @return void
     */
    public function up()
    {
        Schema::create('users', function (Blueprint $table) {
            $table->id();
            $table->string('name');
            $table->string('email')->unique();
            $table->timestamp('email_verified_at')->nullable();
            $table->string('password');
            $table->rememberToken();
            $table->timestamps();
        });
    }

    /**
     * Reverse the migrations.
     *
     * @return void
     */
    public function down()
    {
        Schema::dropIfExists('users');
    }
}
After that, we will migrate the table to the database using the following command.
php artisan migrateNow, we will create a User model using the following command.
app/Models/User.php
<?php

namespace App\Models;

use Illuminate\Contracts\Auth\MustVerifyEmail;
use Illuminate\Database\Eloquent\Factories\HasFactory;
use Illuminate\Foundation\Auth\User as Authenticatable;
use Illuminate\Notifications\Notifiable;
use Laravel\Sanctum\HasApiTokens;

class User extends Authenticatable
{
    use HasApiTokens, HasFactory, Notifiable;

    /**
     * The attributes that are mass assignable.
     *
     * @var array<int, string>
     */
    protected $fillable = [
        'name',
        'email',
        'password',
    ];

    /**
     * The attributes that should be hidden for serialization.
     *
     * @var array<int, string>
     */
    protected $hidden = [
        'password',
        'remember_token',
    ];

    /**
     * The attributes that should be cast.
     *
     * @var array<string, string>
     */
    protected $casts = [
        'email_verified_at' => 'datetime',
    ];
}
In this step, we will create a UserController file using the following command.
php artisan make:controller UserControllerapp/Http/Controllers/UserController.php
<?php

namespace App\Http\Controllers;

use Illuminate\Http\Request;
use App\Models\User;

class UserController extends Controller
{
    public function index()
    {
        $users = User::get();

        return view('index', compact('users'));
    }

    public function store(Request $request)
    {
        $validatedData = $request->validate([
            'name' => 'required',
            'email' => 'required|email|unique:users',
        ], [
            'name.required' => 'Name field is required.',
            'email.required' => 'Email field is required.',
            'email.email' => 'Email field must be email address.',
        ]);


        $user = User::create($validatedData);

        return response()->json(['success' => 'User created successfully.']);
    }
}Now, we will add routes to the web.php file.
routes/web.php
<?php

use Illuminate\Support\Facades\Route;

use App\Http\Controllers\UserController;

/*
|--------------------------------------------------------------------------
| Web Routes
|--------------------------------------------------------------------------
|
| Here is where you can register web routes for your application. These
| routes are loaded by the RouteServiceProvider within a group which
| contains the "web" middleware group. Now create something great!
|
*/

Route::controller(UserController::class)->group(function(){
    Route::get('index', 'index');
    Route::post('store', 'store')->name('store');
});In this step, we will create an index.blade.php file. So, add the following code to that file.
resources/views/index.blade.php
<!DOCTYPE html>
<html>
<head>
    <title>Laravel 10 AJAX Form Validation Example - Websolutionstuff</title>
    <link href="https://cdn.jsdelivr.net/npm/[email protected]/dist/css/bootstrap.min.css" rel="stylesheet">
    <script src="https://cdn.jsdelivr.net/npm/[email protected]/dist/js/bootstrap.bundle.min.js" integrity="sha384-MrcW6ZMFYlzcLA8Nl+NtUVF0sA7MsXsP1UyJoMp4YLEuNSfAP+JcXn/tWtIaxVXM" crossorigin="anonymous"></script>
    <script src="https://cdnjs.cloudflare.com/ajax/libs/jquery/3.6.0/jquery.min.js" ></script>
    <meta name="csrf-token" content="{{ csrf_token() }}" />
</head>
<body>

<div class="container">
    <div class="card bg-light mt-3">
        <div class="card-header">
            <strong>Laravel 10 AJAX Form Validation Example - Websolutionstuff</strong>
        </div>
        <div class="card-body">
            <table class="table table-bordered mt-3">
                <tr>
                    <th colspan="3">
                        List Of Users
                        <button type="button" class="btn btn-success float-end" data-bs-toggle="modal" data-bs-target="#userModal">
                          Create User
                        </button>
                    </th>
                </tr>
                <tr>
                    <th>ID</th>
                    <th>Name</th>
                    <th>Email</th>
                </tr>
                @foreach($users as $user)
                <tr>
                    <td>{{ $user->id }}</td>
                    <td>{{ $user->name }}</td>
                    <td>{{ $user->email }}</td>
                </tr>
                @endforeach
            </table>
        </div>
    </div>
</div>

<!-- Modal -->
<div class="modal fade" id="userModal" tabindex="-1" aria-labelledby="exampleModalLabel" aria-hidden="true">
    <div class="modal-dialog">
        <div class="modal-content">
            <div class="modal-header">
                <h5 class="modal-title" id="exampleModalLabel">Create User</h5>
                <button type="button" class="btn-close" data-bs-dismiss="modal" aria-label="Close"></button>
            </div>
            <div class="modal-body">
                <form id="ajax-form" action="{{ route('store') }}">
                    @csrf
                    <div class="alert alert-danger print-error-msg" style="display:none">
                        <ul></ul>
                    </div>
                    <div class="mb-3">
                        <label for="name" class="form-label">Name:</label>
                        <input type="text" name="name" class="form-control" placeholder="Name">
                    </div>
                    <div class="mb-3">
                        <label for="email" class="form-label">Email:</label>
                        <input type="text" name="email" class="form-control" placeholder="Email">
                    </div>
                    <div class="mb-3 text-center">
                        <button class="btn btn-success btn-submit">Submit</button>
                    </div>
                </form>
            </div>
        </div>
    </div>
</div>
</body>
</html>
<script type="text/javascript">
    $('#ajax-form').submit(function(e) {
        e.preventDefault();

        var url = $(this).attr("action");
        let formData = new FormData(this);

        $.ajax({
                type:'POST',
                url: url,
                data: formData,
                contentType: false,
                processData: false,
                success: (response) => {
                    alert('Form submitted successfully');
                    location.reload();
                },
                error: function(response){
                    $('#ajax-form').find(".print-error-msg").find("ul").html('');
                    $('#ajax-form').find(".print-error-msg").css('display','block');
                    $.each( response.responseJSON.errors, function( key, value ) {
                        $('#ajax-form').find(".print-error-msg").find("ul").append('<li>'+value+'</li>');
                    });
                }
        });
    });
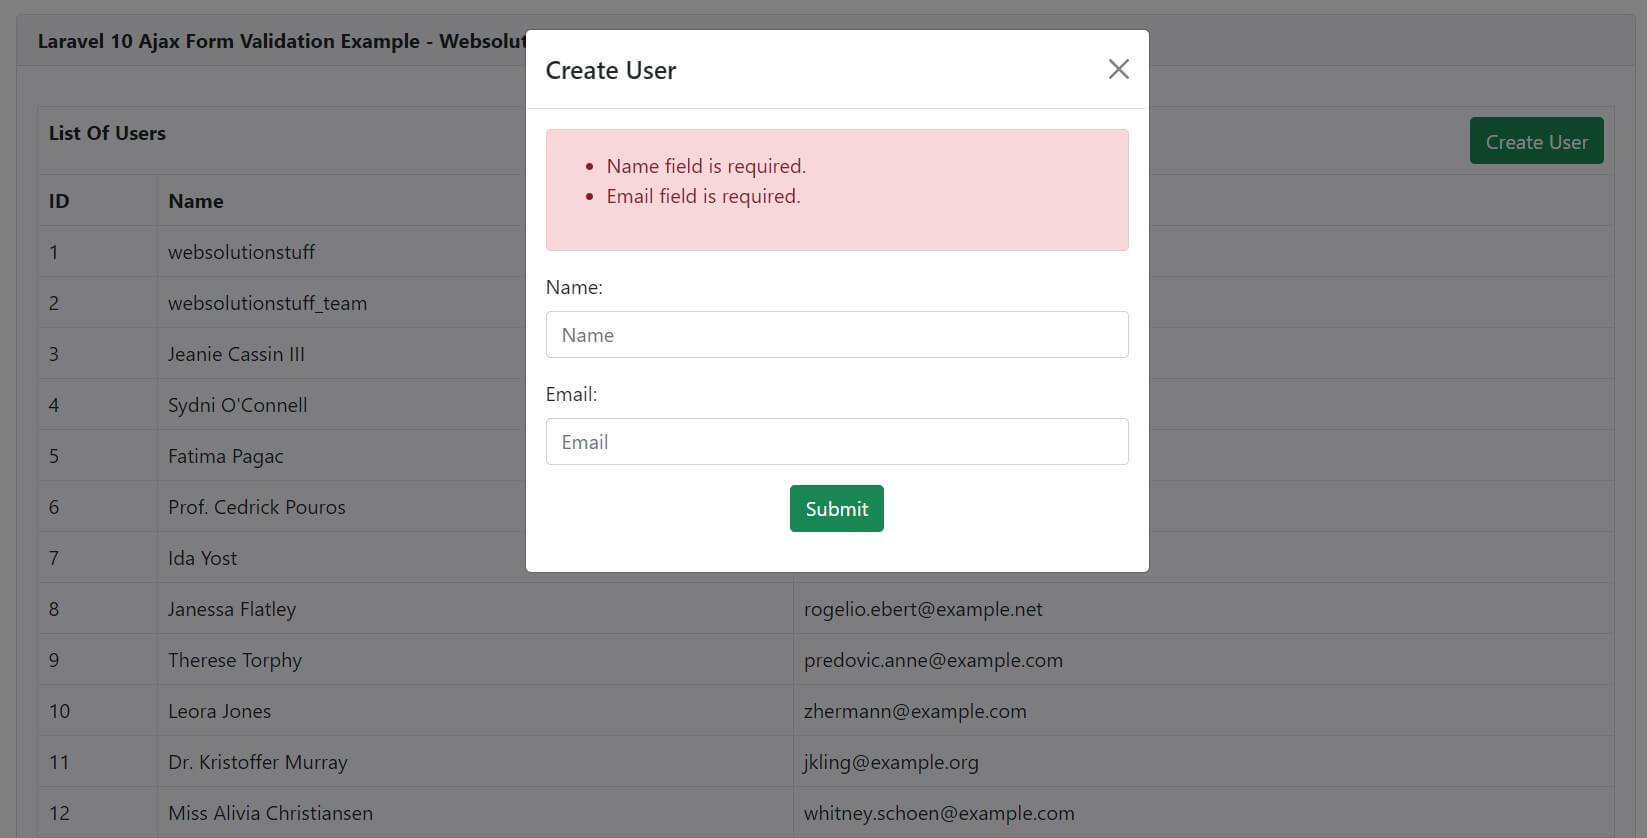
</script>Now, we will run laravel 10 ajax form submit with validation using the following command.
php artisan serveOutput:
You might also like:
- Read Also: Bootstrap Modal In Angular 13
- Read Also: How To Reset Modal Form In jQuery
- Read Also: Laravel 8 One To Many Relationship Example
- Read Also: How To Add Bootstrap 5 Modal Popup In Laravel 9