In this article, we will see how to send bulk mail using queue in laravel 9. Laravel queue is used for sending bulk mail with a background process, as we know if we are sending single mail laravel application it is working properly without taking more time but if you want to send multiple emails in laravel then it will take too much time and also you can not do any operation during this time periods.
So, let's see how to send bulk mail in laravel 9 using queue, laravel 9 send bulk mail using queue, how to send bulk mail in laravel 9, laravel 9 send email using queue
So, if you want to send bulk mail then you need to use the laravel queue using the queue we can send multiple emails in laravel with the background process. let's start and follow the below steps for how to send bulk mail in laravel 9.
Step 1 : Create Laravel 9 Application and Change In .env File
Step 2 : Create Route
Step 3 : Create Queue Table
Step 4 : Create Controller
Step 5 : Create Job
Step 6 : Create Mail Blade
First of we are creating the laravel 9 application and after that, we will set up mail configuration in the .env file as below. here we have used mailtrap.io.
MAIL_MAILER=smtp
MAIL_HOST=smtp.mailtrap.io
MAIL_PORT=2525
MAIL_USERNAME=your_username
MAIL_PASSWORD=your_passowrd
MAIL_ENCRYPTION=TLS

QUEUE_DRIVER=databaseIn this step, we will create routes for sending bulk mail using the queue.
use App\Http\Controllers\SendMailController;

Route::get('send/mail', [SendMailController::class, 'send_mail'])->name('send_mail');Now, we will create a 'jobs' table in the database. So, copy the below command and run it in your terminal.
php artisan queue:table
php artisan migrateIn this step, we will create SendMailController and add the below code.
<?php

namespace App\Http\Controllers;

use Illuminate\Http\Request;

class SendMailController extends Controller
{
    public function send_mail(Request $request)
    {
    	$details = [
    		'subject' => 'Test Notification'
    	];

        $job = (new \App\Jobs\SendQueueEmail($details))
            	->delay(now()->addSeconds(2));

        dispatch($job);
        echo "Mail send successfully !!";
    }
} Now, we need to create the SendQueueEmail.php file in the app\Jobs folder using the below command in your terminal and copy the below code.
php artisan make:job SendQueueEmail<?php
namespace App\Jobs;
use Illuminate\Bus\Queueable;
use Illuminate\Contracts\Queue\ShouldQueue;
use Illuminate\Foundation\Bus\Dispatchable;
use Illuminate\Queue\InteractsWithQueue;
use Illuminate\Queue\SerializesModels;
use App\User;
use Mail;
class SendQueueEmail implements ShouldQueue
{
use Dispatchable, InteractsWithQueue, Queueable, SerializesModels;
protected $details;
public $timeout = 7200; // 2 hours
/**
* Create a new job instance.
*
* @return void
*/
public function __construct($details)
{
$this->details = $details;
}
/**
* Execute the job.
*
* @return void
*/
public function handle()
{
$data = User::all();
$input['subject'] = $this->details['subject'];
foreach ($data as $key => $value) {
$input['email'] = $value->email;
$input['name'] = $value->name;
\Mail::send('mail.Test_mail', [], function($message) use($input){
$message->to($input['email'], $input['name'])
->subject($input['subject']);
});
}
}
}In this step, we will create a mail blade file in resources/views/mail/Test_mail.blade.php and write add below mail content.
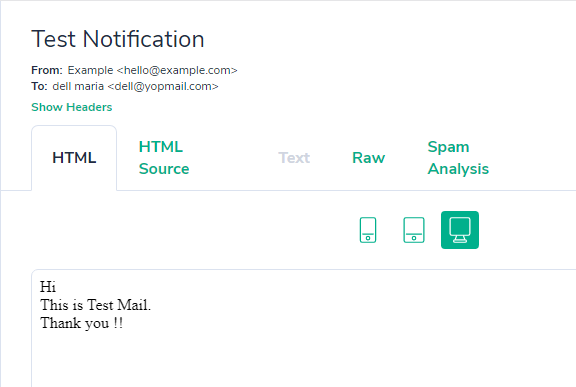
Hi <br/>
This is Test Mail.<br />
Thank you !!
And run the below command in your terminal to send manually mail.
php artisan queue:listenOutput :

You might also like :
- Read Also: Laravel 9 AJAX CRUD Example
- Read Also: Laravel 9 Image Upload Example
- Read Also: How to Run Specific Seeder in Laravel 8
- Read Also: Laravel 9 Import Export CSV/EXCEL File Example


