In this article, we will see the file upload with a progress bar in angular 13. In this example, we will learn how to image upload with the progress bar in angular 13. we will create a simple reactive form with image upload. Also, create a PHP API for image upload. in API service we will write code for showing progress bar percentage code.
So, let's see file upload with progress bar in angular 13, angular 13 image upload, angular 13 file upload with progress bar, file upload in angular 12/13, angular file upload with progress bar, multiple file upload in angular 12/13, image upload in angular 13, angular 13 image upload with progress bar, upload progress bar angular.
In this step, we will create a new app using the below command.
ng new my-new-appNow, we will install the bootstrap core package using the below command.
npm install bootstrap --saveNow, we need to include bootstrap CSS like node_modules/bootstrap/dist/css/bootstrap.min.css. So, add it to the angular.json file.
angular.json
"styles": [

"node_modules/bootstrap/dist/css/bootstrap.min.css",

"src/styles.css"

],
Now, we will import HttpClientModule, ReactiveFormsModule, and ImageUploadService to the app.module.ts file.
src/app/app.module.ts
import { NgModule } from "@angular/core";
import { BrowserModule } from "@angular/platform-browser";
import { FormsModule } from "@angular/forms";
import { HttpClientModule } from "@angular/common/http";

import { AppComponent } from "./app.component";

@NgModule({
  imports: [
    BrowserModule,
    FormsModule,
    HttpClientModule
  ],
  declarations: [AppComponent],
  bootstrap: [AppComponent]
})
export class AppModule {}
In this step, we will update the HTML file.
src/app/app.component.html
<h2>File Upload With Progress Bar In Angular 13 - Websolutionstuff</h2>
<input type="file" (change)="upload($event.target.files[0])">

<div class="progress" *ngIf="progress">
	<div class="progress-bar" [style.width]="progress + '%'">{{progress}}%</div>
</div>Now, we need to update our component.ts file.
src/app/app.component.ts
import { Component } from "@angular/core";

import {
  HttpClient,
  HttpEventType,
  HttpErrorResponse
} from "@angular/common/http";

import { map, catchError } from "rxjs/operators";

import { throwError } from "rxjs";

@Component({
  selector: "my-app",
  templateUrl: "./app.component.html",
  styleUrls: ["./app.component.css"]
})
export class AppComponent {
  progress: number;

  constructor(private http: HttpClient) {}

  upload(file) {
    this.progress = 1;
    const formData = new FormData();
    formData.append("file", file);

    this.http
      .post("your-url-here", formData, {
        reportProgress: true,
        observe: "events"
      })
      .pipe(
        map((event: any) => {
          if (event.type == HttpEventType.UploadProgress) {
            this.progress = Math.round((100 / event.total) * event.loaded);
          } else if (event.type == HttpEventType.Response) {
            this.progress = null;
          }
        }),
        catchError((err: any) => {
          this.progress = null;
          alert(err.message);
          return throwError(err.message);
        })
      )
      .toPromise();
  }
}In last, we need to run the server using the below command.
ng serveNow, Go to your web browser, type the given URL and view the app output.
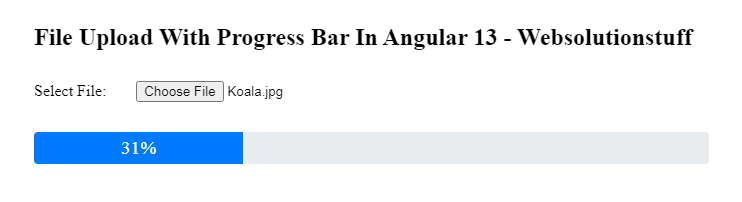
Output:
You might also like:
- Read Also: How To File Upload Using Node.js
- Read Also: Laravel 9 Create Zip File And Download
- Read Also: Multiple Row Grouping Datatables jQuery
- Read Also: Drag and Drop File Upload Using Dropzone js in Laravel 9