Nếu có bạn nào đã từng làm lab với Portswigger thì chắc hẳn cũng biết Exploit Server của Portswigger hoạt động như nào.
Nếu bạn nào chưa biết về Exploit Server này thì mình có thể mô tả nó 1 chút, cũng khá đơn giản thôi  .
.
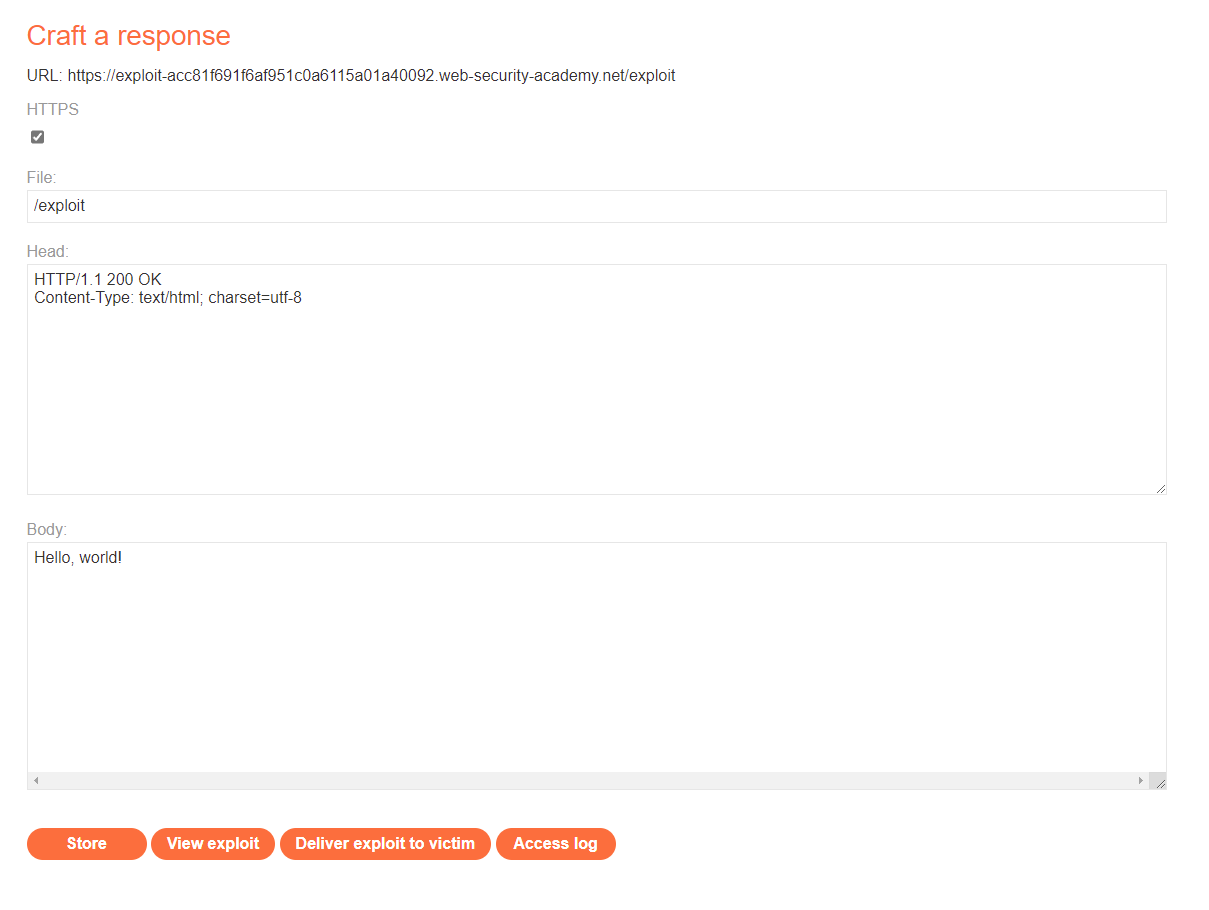
Đầu tiên Exploit Server có 4 phần
- HTTPS: Sử dụng HTTPS hay không
- File: nó chính là URI đó
- Head: Phần đầu của response mà bạn muốn server trả về
- Body: Phần thân của response mà bạn muốn server trả về
Ví dụ với setting như hình trên, khi truy cập vào URL ta sẽ được response như sau

Cách hoạt động khá là đơn giản phải không, mình nhiều khi cần phải sử dụng Exploit Server như này để exploit hay kiểm tra lỗ hổng bảo mật cho các project pentest. Mà sử dụng cái Exploit Server của Portswigger nó cần phải truy cập hơi lằng nhằng + có expired time nên mình tự code lấy 1 server để tự xài luôn 
Code Exploit Server Simulator
Đầu tiên, do cách hoạt động khá đơn giản + hiển thị raw response như trên, các bạn có thể sử dụng bất kỳ ngôn ngữ nào cũng được, ở đây mình sử dụng NodeJS Express cho nó đơn giản
Index
Đầu tiên mình khai báo các thành phần để hiển thị ra bên ngoài index, giao diện thì clone giống y đúc của Portswigger thôi, sử dụng pug để làm view engine.
const express = require('express')
const app = express()
const bodyParser = require('body-parser');
const port = 3001
const morgan = require('morgan');
const path = require('path')
const fs = require('fs')

let responseHead = `HTTP/1.1 200 OK
Content-Type: text/html; charset=UTF-8`
let responseFile = '/exploit'
let responseBody = 'Hello, world!'

//index
app.get('/', (req, res) => {
   res.render('form', { responseHead, responseFile, responseBody});
});

app.set('view engine', 'pug');
Tiếp theo
// public static file
app.use(express.static('public'))

// for parsing application/xwww-form-urlencoded
app.use(bodyParser.urlencoded({ extended: true }));
để public thư mục static ra ngoài như style.css
Store response in server
app.post('/', function(req, res){
  responseHead = req.body.responseHead
  responseFile = req.body.responseFile
  responseBody = req.body.responseBody
  formAction = req.body.formAction
  if (formAction === 'ACCESS_LOG'){
    res.redirect(302, "/access-log")
    return;
  }
  if (formAction === 'VIEW_EXPLOIT'){
    res.redirect(302, responseFile)
    return;
  } else {
    res.redirect(302, "/")
    res.end()
  }
});
Đoạn này mình lấy toàn bộ thông tin header, file, body để lưu lại vào biến, và có các action tương ứng để chạy như truy cập file log, view exploit.
Exploit
// Get URI exploit
app.get('*', (req, res) => {
  if (req.path !== responseFile) {
    res.status(404).send();
    return;
  }

  const responseMessage = `${responseHead}

  ${responseBody}

  `
  res.socket.end(responseMessage)
});
Đoạn này mình lấy trên mạng chỉ là hiển thị raw response thôi, các bạn có thể thêm header, body tuỳ ý, mình lấy trực tiếp giá trị trong trường Head, Body, File để trả về giá trị thôi
Access Log
// create access-log
var accessLogStream = fs.createWriteStream(path.join(__dirname, '/public/access.log'), { flags: 'a' })
app.use(morgan('combined', { stream: accessLogStream }))
Ở đây mình sử dụng fs và morgan có sẵn để lưu tất tần tật log request lại, log request có thể check được ip, user-agent, thời gian, vân vân ...
https://github.com/tuannm-1876/exploit-server-simulator
Muốn public ra ngoài internet thì có thể sử dụng những dịch vụ như ngrok,localtunnel .. vừa public port ra ngoài internet vừa có thể sử dụng HTTP, HTTPS được.
Missing feature
Do lười + code khá là ngờ u nên vẫn còn vài feature chưa hoàn thiện, hi vọng các bạn có thể contribute ae sử dụng
- Dockerfile
- Multi URI exploit
- Header and Body with Byte-code