In this article, we will see how to image optimization in laravel 9 using spatie. Here, we will learn about image optimization in laravel 8 and laravel 9. Here will use spatie/image-optimizer package to optimize the image. It can easily optimize the image.
This package can optimize PNGs, JPGs, SVGs and GIFs by running them through a chain of various image optimization tools.
So, let's see laravel 9 image compression, how to optimize images in laravel 9, laravel 9 image resize, laravel 9 image optimizer, and image optimizer laravel 8.
In this step, we will install laravel 9 using the following command.
composer create-project laravel/laravel laravel-9-image-optimizationNow, we will install the image optimizer package using the composer command.
composer require spatie/image-optimizerThe package will use these optimizers if they are present on your system:
In this step, we will publish the package using the following command.
php artisan vendor:publish --provider="Spatie\LaravelImageOptimizer\ImageOptimizerServiceProvider"After running the above command, it can generate an image-optimizer.php file.
config/image-optimzer.php
<?php

use Spatie\ImageOptimizer\Optimizers\Cwebp;
use Spatie\ImageOptimizer\Optimizers\Gifsicle;
use Spatie\ImageOptimizer\Optimizers\Jpegoptim;
use Spatie\ImageOptimizer\Optimizers\Optipng;
use Spatie\ImageOptimizer\Optimizers\Pngquant;
use Spatie\ImageOptimizer\Optimizers\Svgo;

return [
    /*
     * When calling `optimize` the package will automatically determine which optimizers
     * should run for the given image.
     */
    'optimizers' => [

        Jpegoptim::class => [
            '-m85', // set maximum quality to 85%
            '--strip-all',  // this strips out all text information such as comments and EXIF data
            '--all-progressive',  // this will make sure the resulting image is a progressive one
        ],

        Pngquant::class => [
            '--force', // required parameter for this package
        ],

        Optipng::class => [
            '-i0', // this will result in a non-interlaced, progressive scanned image
            '-o2',  // this set the optimization level to two (multiple IDAT compression trials)
            '-quiet', // required parameter for this package
        ],

        Svgo::class => [
            '--disable=cleanupIDs', // disabling because it is know to cause troubles
        ],

        Gifsicle::class => [
            '-b', // required parameter for this package
            '-O3', // this produces the slowest but best results
        ],

        Cwebp::class => [
            '-m 6', // for the slowest compression method in order to get the best compression.
            '-pass 10', // for maximizing the amount of analysis pass.
            '-mt', // multithreading for some speed improvements.
            '-q 90', // quality factor that brings the least noticeable changes.
        ],
    ],

    /*
    * The directory where your binaries are stored.
    * Only use this when you binaries are not accessible in the global environment.
    */
    'binary_path' => '',

    /*
     * The maximum time in seconds each optimizer is allowed to run separately.
     */
    'timeout' => 60,

    /*
     * If set to `true` all output of the optimizer binaries will be appended to the default log.
     * You can also set this to a class that implements `Psr\Log\LoggerInterface`.
     */
    'log_optimizer_activity' => false,
];
In this step, we will create routes in the web.php file.
routes/web.php
<?php

use Illuminate\Support\Facades\Route;
use App\Http\Controllers\ImageOptimizationController;


/*
|--------------------------------------------------------------------------
| Web Routes
|--------------------------------------------------------------------------
|
| Here is where you can register web routes for your application. These
| routes are loaded by the RouteServiceProvider within a group which
| contains the "web" middleware group. Now create something great!
|
*/

Route::get('/optimize', [ImageOptimizationController::class, 'index']);
Route::get('/optimize/images', [ImageOptimizationController::class, 'store'])->middleware('optimizeImages');Now, we will create ImageOptimizatioController using the following command.
php artisan make:controller ImageOptimizationController
app/Http/Controllers/ImageOptimizationController.php
<?php

namespace App\Http\Controllers;

use Illuminate\Http\Request;
use Session;

class ImageOptimizationController extends Controller
{
    public function index(){
        return view('image-optimize');
    }

    public function store() {
        $this->validate(request(), [
            'image' => 'required|image:jpeg '
        ]);

        request()->image->storeAs('images', 'optimized-img.jpg');

        Session::put('success', 'Image has been successfully optimize');

        return redirect()->back();
    }
}Spatie package provides its own middleware for image optimization. add middleware in the kernel.php.
app/Http/Kernel.php
protected $routeMiddleware = [
        ..
        ..
        'optimizeImages' => \Spatie\LaravelImageOptimizer\Middlewares\OptimizeImages::class,
];Now, we will create an image-optimizer.blade.php file. So, add the following HTML code to that file.
resources/views/image-optimize.blade.php
<!DOCTYPE html>
<html lang="{{ str_replace('_', '-', app()->getLocale()) }}">
    <head>
        <meta charset="utf-8">
        <meta name="viewport" content="width=device-width, initial-scale=1">

        <title>Laravel</title>
        <link href="https://cdnjs.cloudflare.com/ajax/libs/twitter-bootstrap/4.0.0-alpha/css/bootstrap.css" rel="stylesheet">
    </head>
    <body class="antialiased">
        <div class="container">
            <div class="panel-body">
                <div class="col-md-8">
                    <h5 style="margin-top: 50px;margin-bottom:30px;">How To Image Optimization In Laravel 9 Using Spatie - Websolutionstuff</h5>
                @if ($message = Session::get('success'))
                <div class="alert alert-success alert-block">
                    <button type="button" class="close" data-dismiss="alert">×</button>
                    <strong>{{ $message }}</strong>
                    {{ Session::flush(); }}
                </div>
                @endif

                @if (count($errors) > 0)
                    <div class="alert alert-danger">
                        <strong>Whoops!</strong> There were some problems with your input.
                        <ul>
                            @foreach ($errors->all() as $error)
                                <li>{{ $error }}</li>
                            @endforeach
                        </ul>
                    </div>
                @endif

                <form action="/optimize/images" method="POST" enctype="multipart/form-data">
                @csrf
                    <div class="row"> <br>
                        <div class="col-md-6">
                            <input type="file" name="image" class="form-control">
                        </div>
                        <div class="col-md-6">
                            <button type="submit" class="btn btn-success">Upload</button>
                        </div>
                    </div>
                </form>
                </div>
            </div>
        </div>
    </body>
</html>
Now, we will run the laravel 9 image optimizer application using the following command.
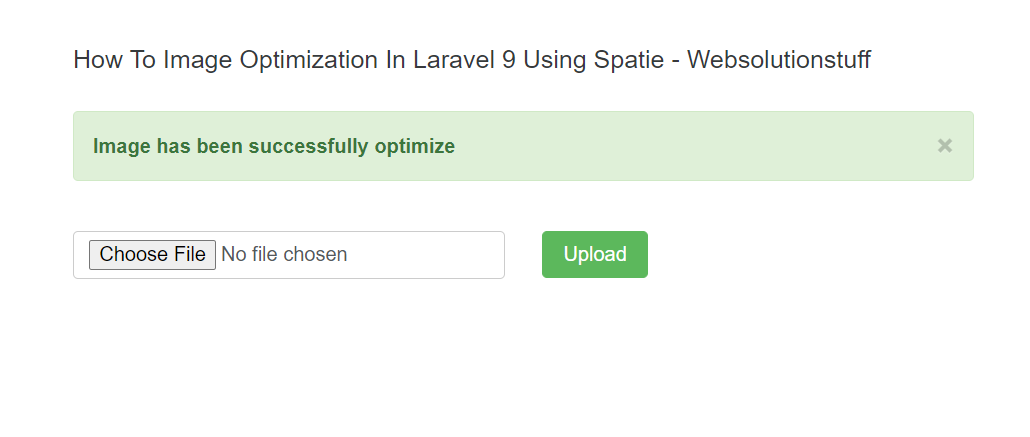
php artisan serveOutput:

You might also like:
- Read Also: Laravel 9 Resize Image Before Upload
- Read Also: How To Convert Image To Base64 In Laravel 9
- Read Also: Laravel 9 CRUD With Image Upload Example
- Read Also: Laravel 9 Image Upload In Summernote Editor


