Giới thiệu
Như chúng ta đã biết có nhiều loại authentication bao gồm email/password, phone number, sử dụng facebook/google, ... Authentication với số điện thoại cũng là một loại khá hay và phổ biến vì nó không cần yêu cầu người dùng phải nhớ mật khẩu, chỉ cần có số điện thoại là sẽ login vào được. Tuy nhiên việc gửi SMS sẽ có giá cao hơn so với loại authentication khác như email chẳng hạn.
Rất may, Firebase phone number auth sẽ giúp bạn giải quyết vấn đề này. Plan free của nó là 10k/tháng (pricing). Rất hợp với dự án vừa startup.
Hôm này chúng ta sẽ cùng nhau tìm hiểu và build một demo phone number authentication với Firebase và ReactJs.
Set up Firebase project
- Vào firebase console https://console.firebase.google.com
- Tạo project mới

- Register Web app mới

Xong thì mình sẽ nhận được firebaseConfig cho Web app của mình
  var firebaseConfig = {
    apiKey: "",
    authDomain: "",
    projectId: "",
    storageBucket: "",
    messagingSenderId: "",
    appId: "",
    measurementId: ""
  };
Setting up Firebase Authentication
- Trên sidebar, click trên Authentication
- Chọn tab Sign-in method
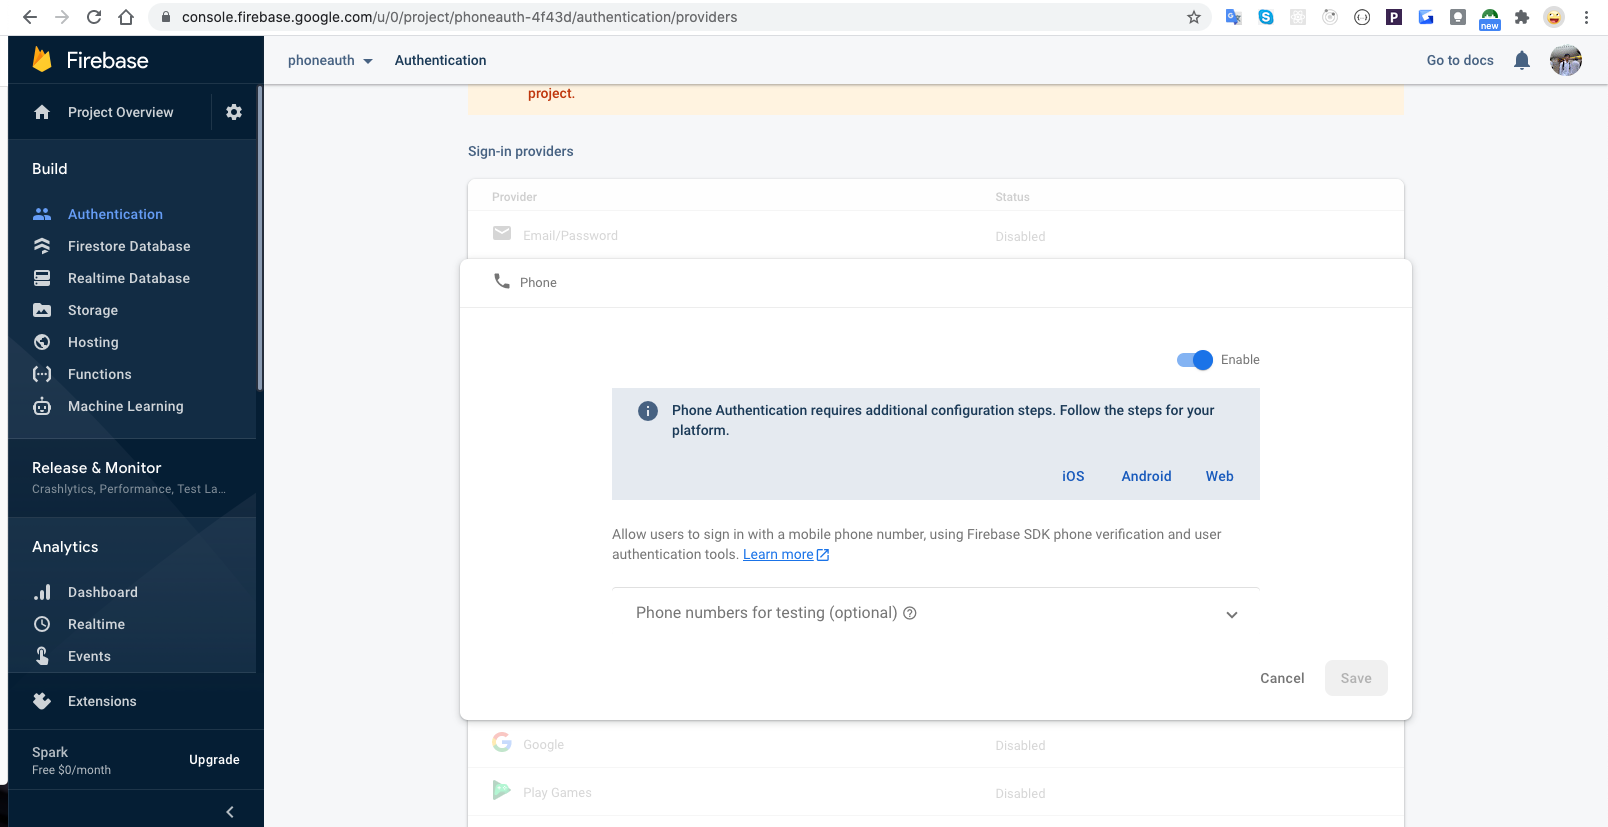
- Trên Phone, click nút Edit

Mình cần Enable, và click Save
Ở trong Phone numbers for testing (optional) dành cho testing. Nó sẽ giúp mình test thoải mái không mất phí hoặc quota. Bạn có thể nhập Phone number và verification code vào.
Implementing
- Tạo project ReactJs mới
npx create-react-app phone_auth_demo
- Install
firebase
yarn add firebase
- Tạo file
firebase.js: dùng để initialize firebase
import firebase from 'firebase';

const firebaseConfig = {
  apiKey: "",
  authDomain: "",
  projectId: "",
  storageBucket: "",
  messagingSenderId: "",
  appId: "",
  measurementId: ""
};

firebase.initializeApp(firebaseConfig);
const auth = firebase.auth();
export { auth, firebase };
- Tạo file
Login.jsx: chứa authentication logic và UI
import React, { useState } from 'react';
import { firebase, auth } from './firebase';

const Login = () => {
    const [phoneNumber, setPhoneNumber] = useState("");
    const [otp, setOtp] = useState('');
    const [step, setStep] = useState('INPUT_PHONE_NUMBER');
    const [result, setResult] = useState('');

	const signin = () => {
		if (phoneNumber === "") return;

		let verify = new firebase.auth.RecaptchaVerifier('recaptcha-container', {
              'size': 'invisible'
          });

		auth.signInWithPhoneNumber(phoneNumber, verify).then((result) => {
            setResult(result);
            setStep('VERIFY_OTP');
		})
        .catch((err) => {
          alert(err);
        });
	}

	const ValidateOtp = () => {
		if (otp === null) return;

		result.confirm(otp).then((result) => {
          setStep('VERIFY_SUCCESS');
		})
        .catch((err) => {
          alert("Incorrect code");
       })
	}

	return (
		<div style={{ marginTop: 100 }}>
			<center>

                {step === 'INPUT_PHONE_NUMBER' &&
                  <div>
                    <input value={phoneNumber} onChange={(e) => { setPhoneNumber(e.target.value) }}
                      placeholder="phone number" />
                    <br/><br/>
                    <div id="recaptcha-container"></div>
                    <button onClick={signin}>Send OTP</button>
                  </div>
                }

                {step === 'VERIFY_OTP' &&
                  <div>
                    <input type="text" placeholder={"Enter your OTP"}
                      onChange={(e) => { setOtp(e.target.value) }} />
                    <br/><br/>
                    <button onClick={ValidateOtp}>Verify</button>
                  </div>
                }

                {step === 'VERIFY_SUCCESS' &&
                  <h3>Verify success</h3>
                }

                {step === 'VERIFY_FAIL' &&
                  <h3>Verify Fail</h3>
                }
			</center>
		</div>
	);
}

export default Login;
Explain:
- Gửi verification code đến điện thoại của người dùng
Sau khi người dùng nhập số điện thoại vào, click Send OTP, hàm sau sẽ được gọi:
signInWithPhoneNumber(phoneNumber, reCAPTCHAVerifier)
Hàm này dùng để gửi OTP đến số điện thoại. Nó nhận 2 biến:
- số điện thoại
- reCAPTCHA verifier: firebase dùng nó để xác nhận người dùng là thật hay là bot. Bạn xem chi tiết thêm ở đây https://firebase.google.com/docs/auth/web/phone-auth?authuser=0#set-up-the-recaptcha-verifier
- Sign in người dùng với verification code
Sau khi verification code đã gửi đến người dùng, bước tiếp theo là người dùng đó sẽ phải nhập verification code vào. Sau khi nhập vào xong và click Verify, hàm confirm(code) sẽ được gọi. Hàm này dùng để kiểm tra verification code đó là đúng hay sai.
Demo
Đến đây là xong, kết quả như sau:


