In this article, we will see how two-way data binding in angular 12. When you create a variable or property to data, it is called data binding in angular. Two-way binding gives components in your application a way to share data. Use two-way binding to listen for events and update values simultaneously between parent and child components.
So, let's see angular two-way binding, one-way binding and two-way binding in angular 11/12/13, one-way data binding in angular, ngmodel two-way binding, angularjs two way binding example
There are two types of data binding.
- Property binding
- Event binding
Angular's two-way binding syntax is a combination of square brackets and parentheses, [()]. The [()] syntax combines the brackets of property binding, [] with the parentheses of event binding, ().
When you set values for property to HTML elements or directives, it is called property binding. Property binding is used to work in HTML, like input value, dynamic CSS, or Javascript.
app.component.ts you define.
imageURL = '../assets/data.png';And you bind its value in HTML app.component.html as follows.
<img [src]="imageURL">Event binding allows you to listen for events like click, mouse hover, etc. It works the same as Javascript events.
You can define events in the HTML view app.component.html
<button (click)="onSave()">Save</button>In two-way binding, A component shares property data to the HTML view and the HTML event sends data to the component. The two-way binding combines both property binding and event binding.
In this example. we will bind the text box with the property. When the user changes the textbox value, it will send data to the component and it will update the HTML view.
src/app/app.component.ts
import { Component } from '@angular/core';

@Component({
  selector: 'app-root',
  templateUrl: './app.component.html',
  styleUrls: ['./app.component.css']
})
export class AppComponent {
  username: string = 'websolutionstuff';
}In HTML view, add textbox which binds username property. On changing its value, ngModel will update its value which changes its value in the h1 tag.
<h3>Two Way Data Binding In Angular 12 - websolutionstuff</h3>
<form action="#">
  <h1>{{ username }}</h1>
  <label for="name">Name</label>
  <input [(ngModel)]="username" id="username" name="username" placeholder="username">
</form>
As we are using form elements, we need to import FormsModule in app.module.ts
import { NgModule } from '@angular/core';
import { BrowserModule } from '@angular/platform-browser';
import { FormsModule } from '@angular/forms';

import { AppRoutingModule } from './app-routing.module';
import { AppComponent } from './app.component';

@NgModule({
  declarations: [
    AppComponent
  ],
  imports: [
    BrowserModule,
    AppRoutingModule,
    FormsModule
  ],
  providers: [],
  bootstrap: [AppComponent]
})
export class AppModule { }
If you want to give style to form, you can add CSS to app.component.css
*, *:before, *:after {
  -moz-box-sizing: border-box;
  -webkit-box-sizing: border-box;
  box-sizing: border-box;
  color: #384047;
}
h1,h3 {
  margin: 0 0 30px 0;
  text-align: center;
}
form {
  max-width: 500px;
  margin: 10px auto;
  padding: 10px 20px;
  background: #f4f7f8;
  border-radius: 8px;
}
input {
  background: rgba(255,255,255,0.1);
  border: none;
  font-size: 16px;
  height: auto;
  margin: 0;
  outline: 0;
  padding: 15px;
  width: 100%;
  background-color: #e8eeef;
  color: #8a97a0;
  box-shadow: 0 1px 0 rgba(0,0,0,0.03) inset;
  margin-bottom: 30px;
}
label {
  display: block;
  margin-bottom: 8px;
  font-weight: bold;
}
Output:
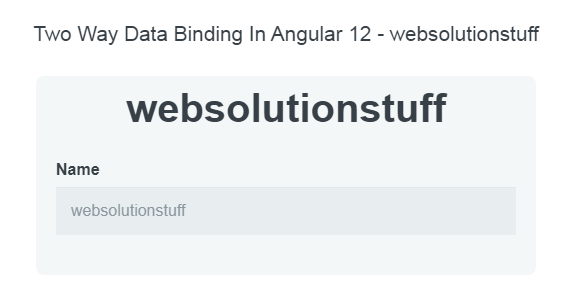
Now, we will run the server.
ng serveOpen the URL on the browser and try http://localhost:4200
http://localhost:4200You might also like :
- Read Also: Laravel 9 AJAX CRUD Example
- Read Also: How To Install Angular In Ubuntu
- Read Also: Laravel 9 Yajra Datatable Example
- Read Also: How To Create Dynamic Bar Chart In Laravel 9