1. Create EC2 on AWS and install apache server
Step 1:
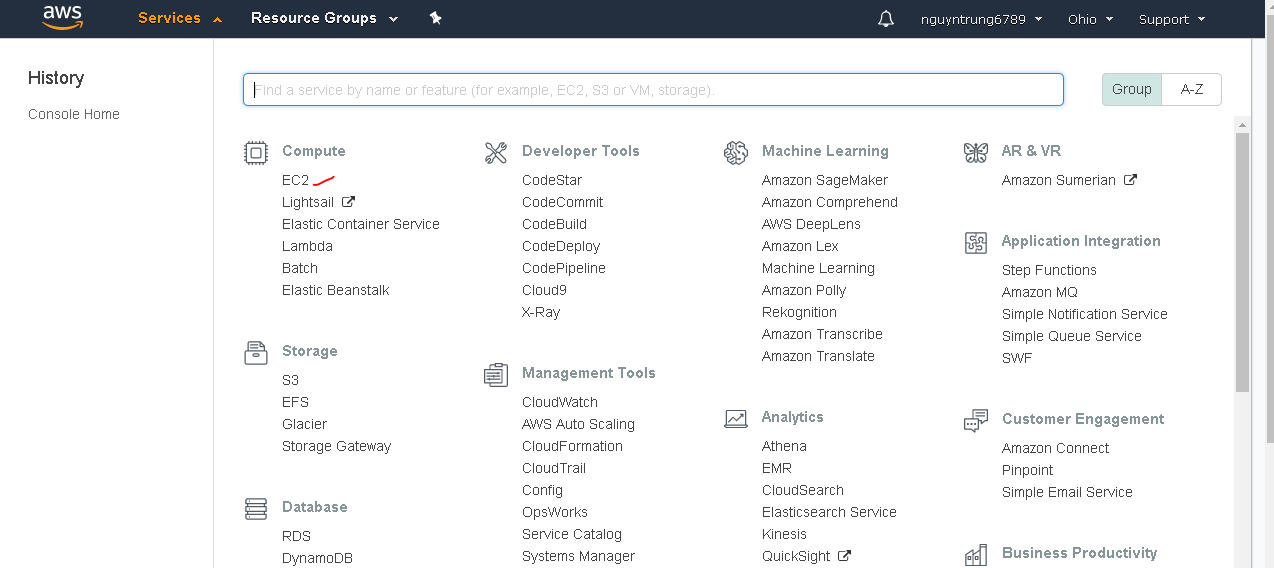
Step 2:
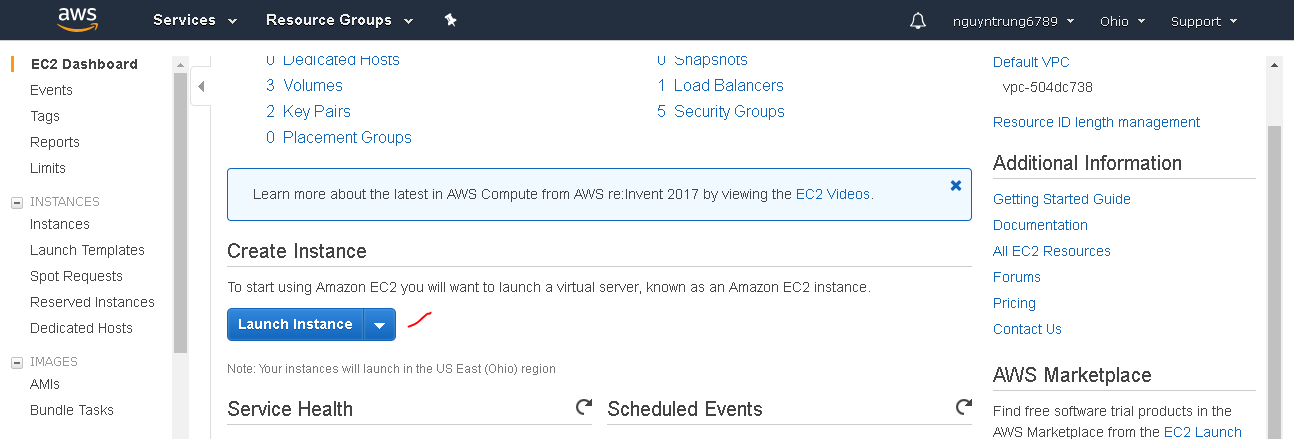
Step 3:
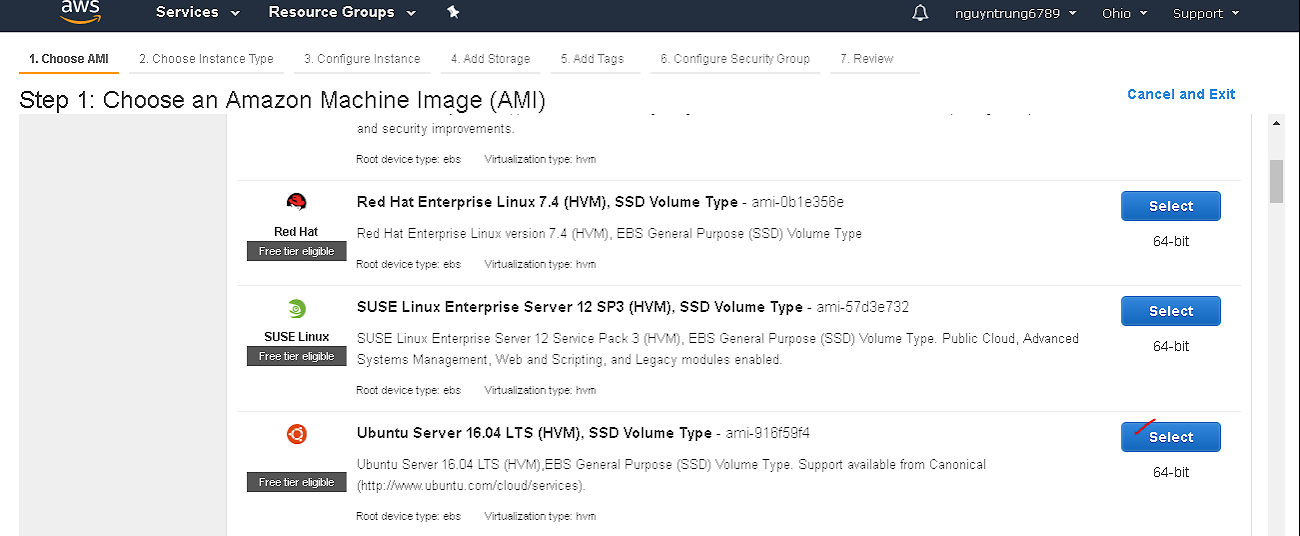
Step 4:
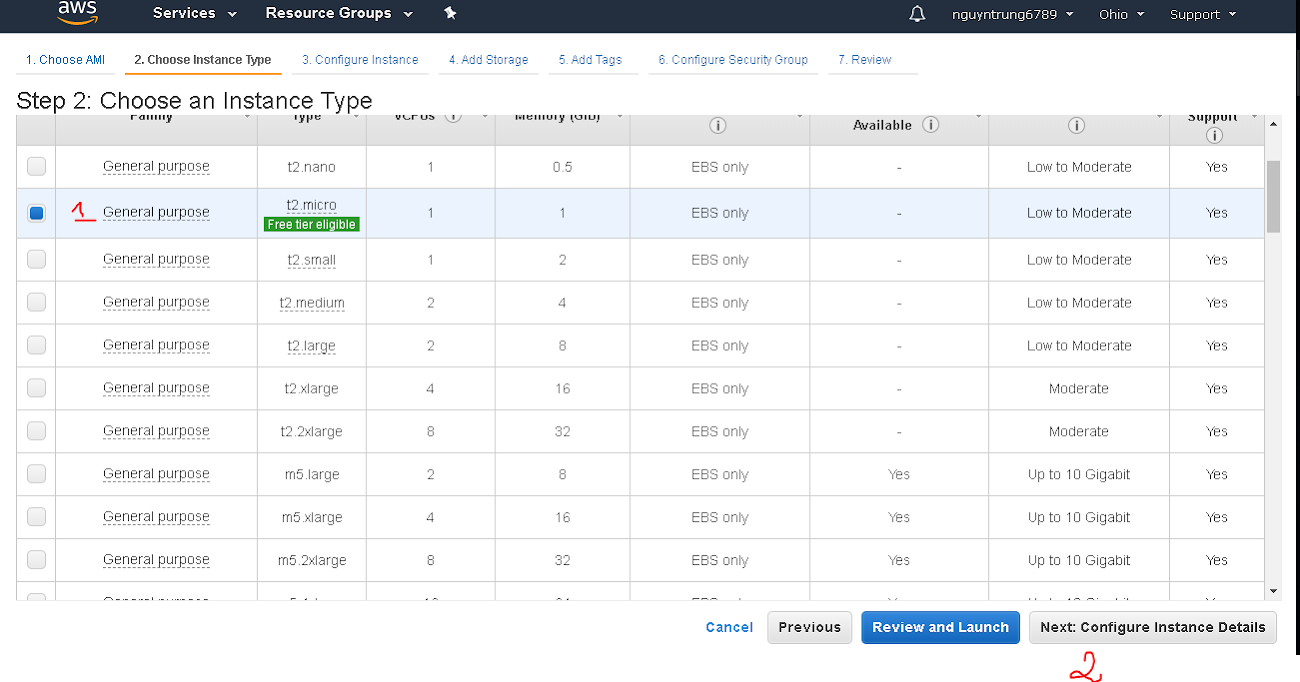
Step 5:
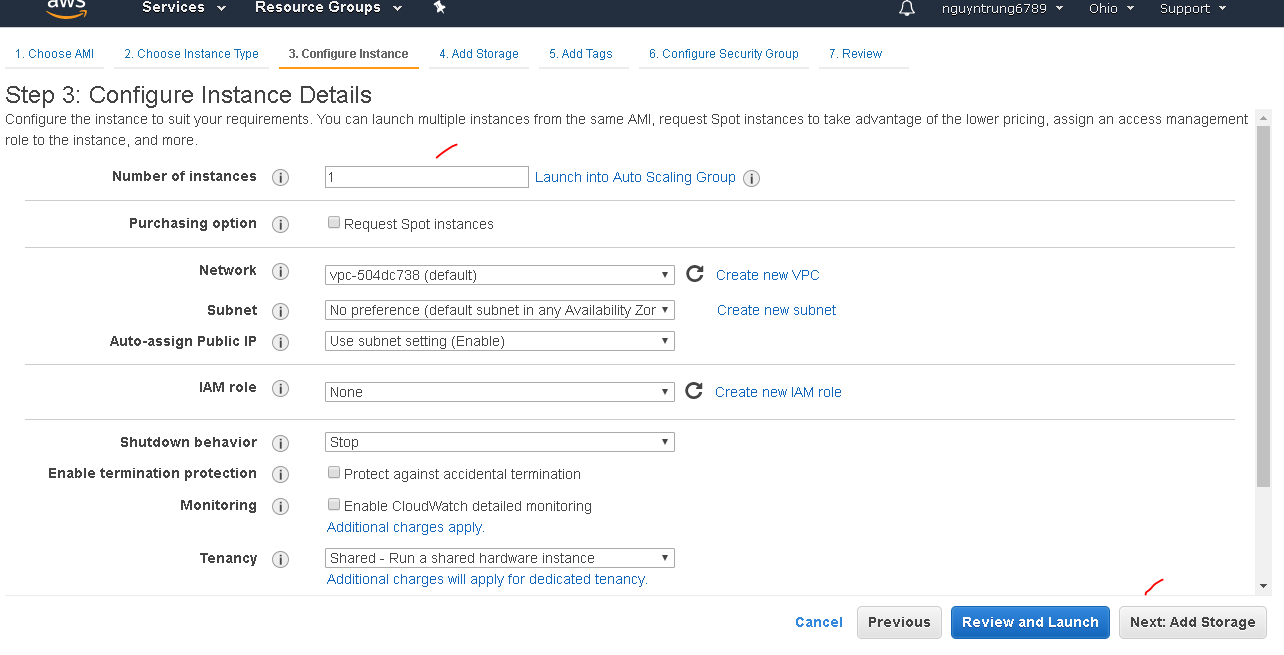
Step 6:
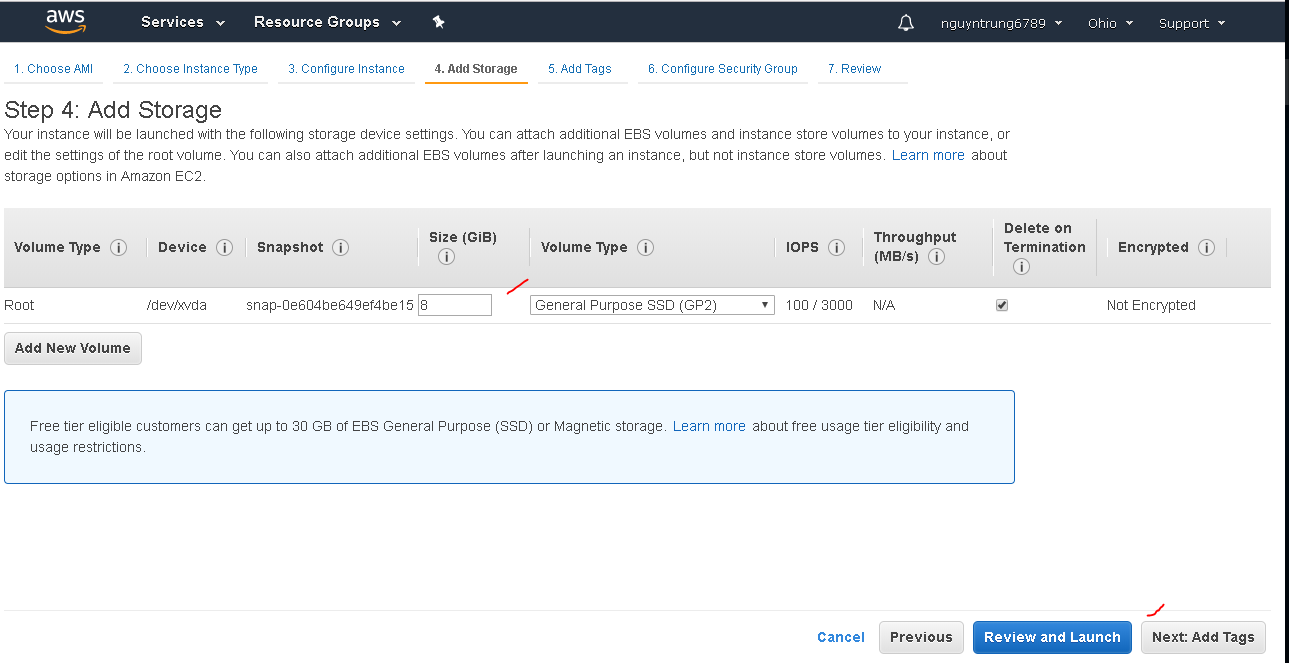
Step 7:
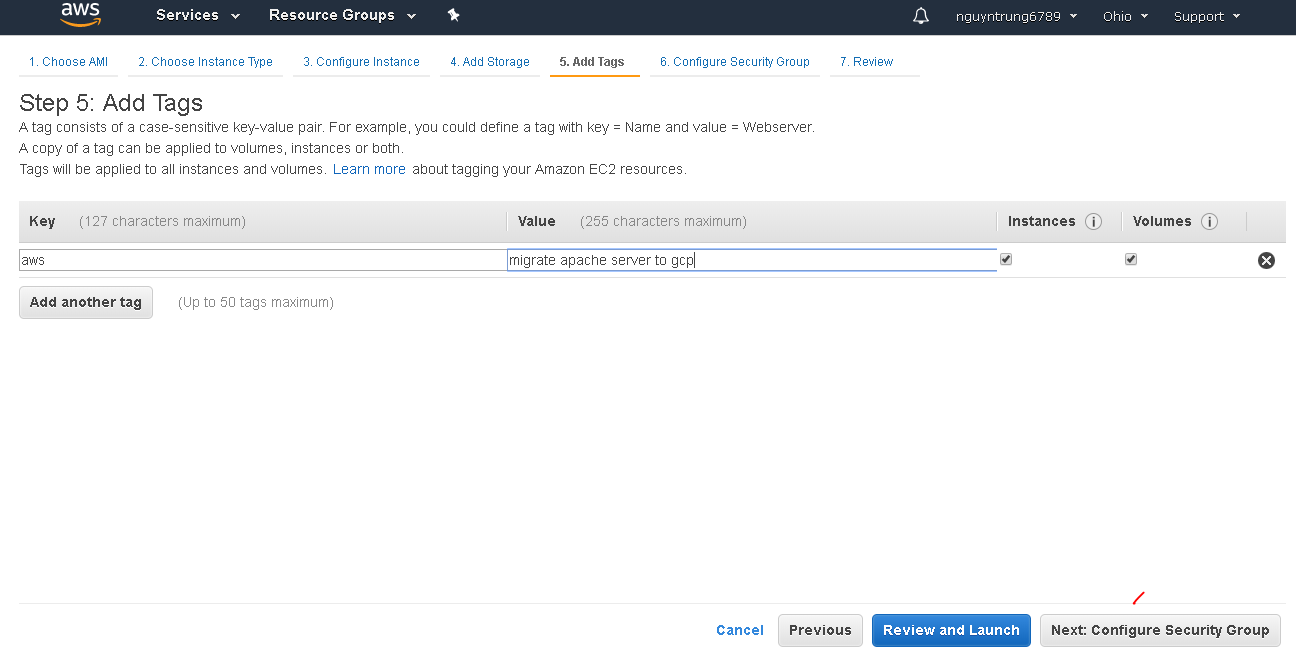
Step 8:
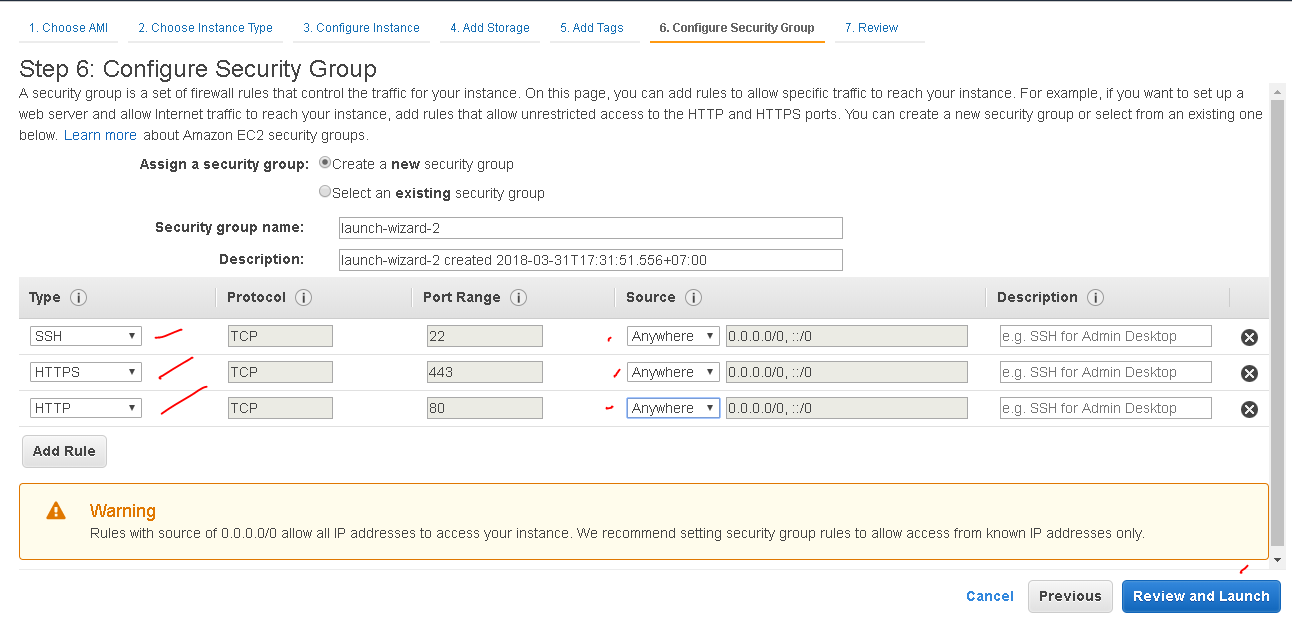
Step 9:
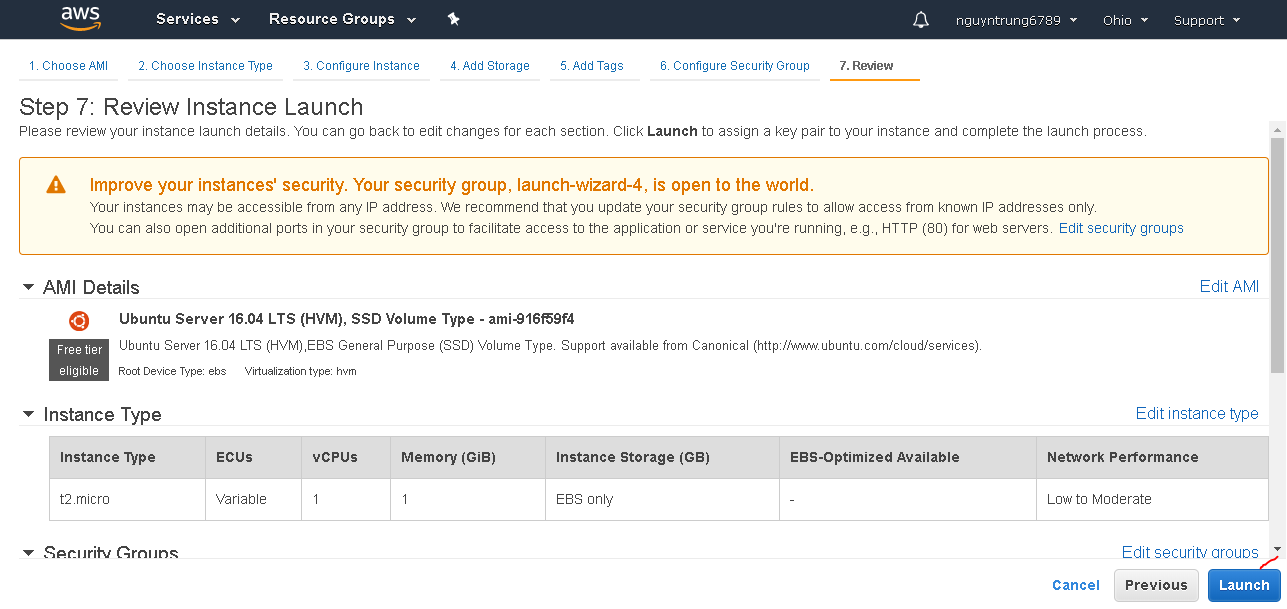
Step 10:
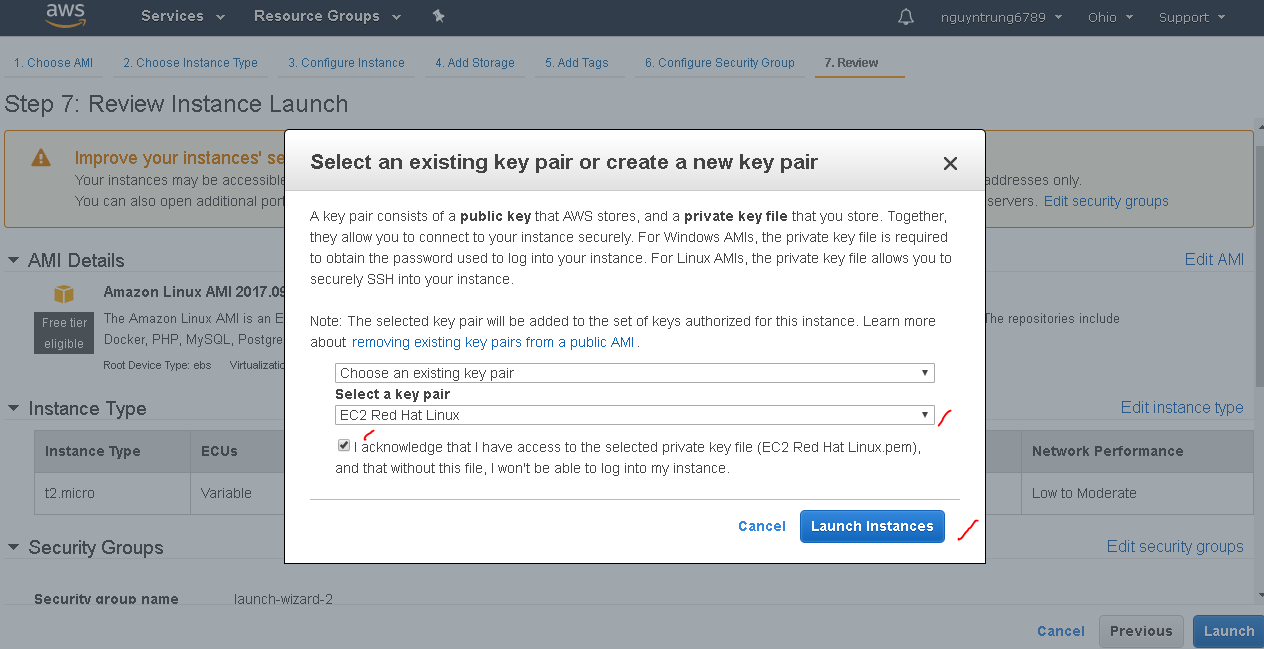
Step 11:
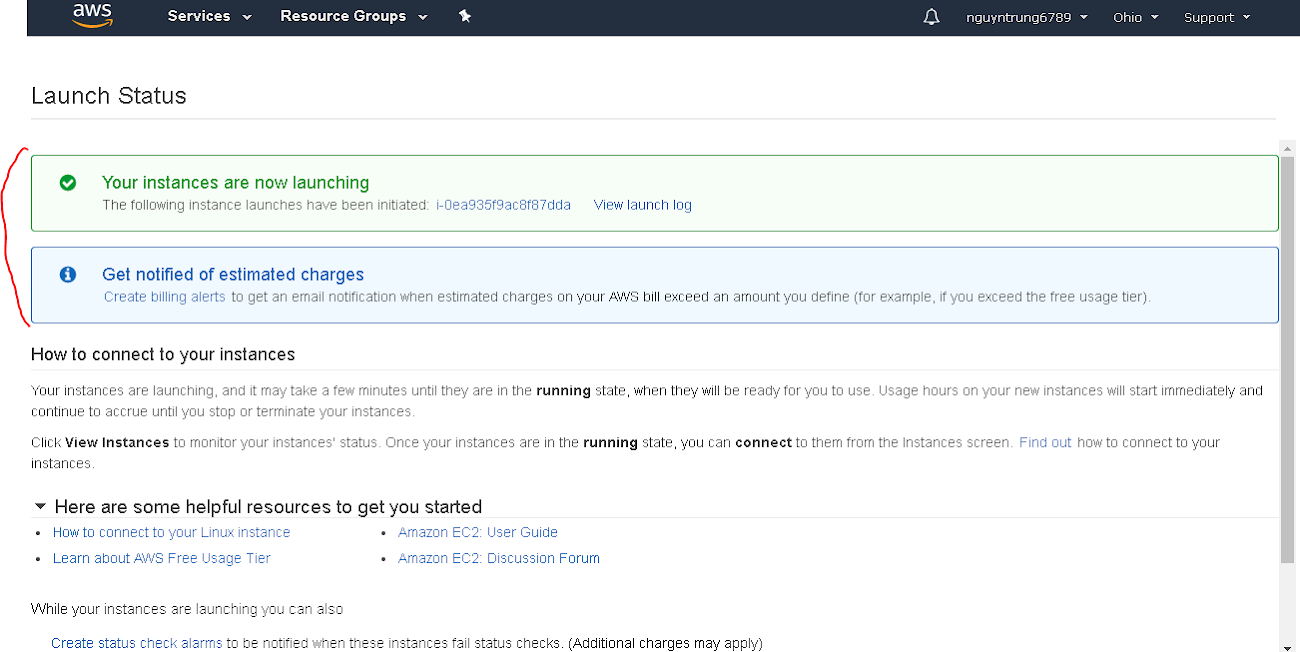
Step 12:

Install Apache in AWS
Connect to AWS by Putty:
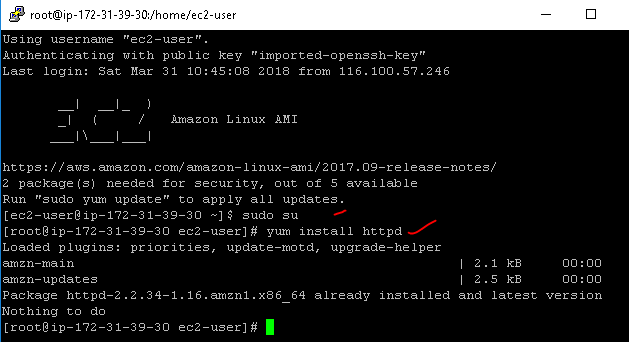
Install Apache server on Centos: yum install httpd
-
Configure Apache Server on CentOS, RedHat, Linux:
- Set the apache service to start on boot:
chkconfig --levels 235 httpd on - Enable name-based virtual hosting on port 80:
- Open the httpd configuration file located at /etc/httpd/conf/httpd.conf:
vi /etc/httpd/conf/httpd.conf - Un-comment the line containing the text:
NameVirtualHost *:80
- Open the httpd configuration file located at /etc/httpd/conf/httpd.conf:
- Save the file
- Restart the Apache HTTP Server daemon: service httpd restart
![]()
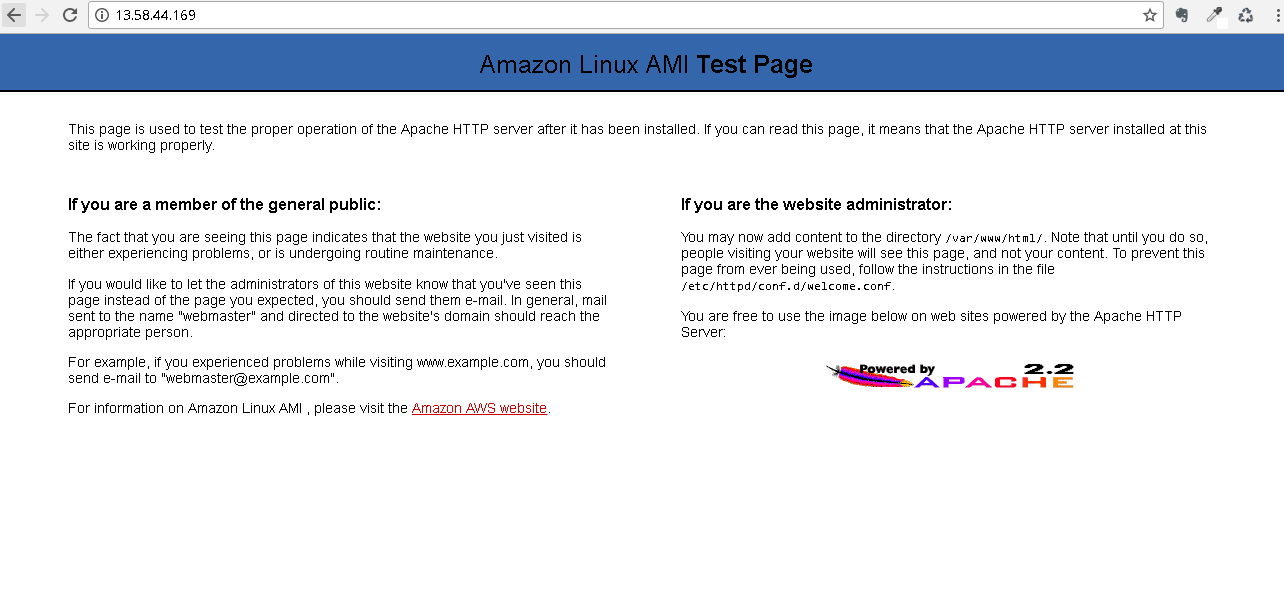
13.58.44.169: IP public of VM EC2 in AWS
- Set the apache service to start on boot:
We will install Apache on Ubuntu for this lab
sudo apt-get update
sudo apt-get install apache2
 18.188.92.61: IP public of VM EC2 in AWS
2. Generating the Required GCP Credentials
2.1. Create a project in GCP
Research more at here to update the GCP's latest information
2.2. Enable Google Compute Engine API
Open the Products & services menu, select APIs & Services > Dashboard
 On the Dashboard page, click the ENABLE APIS & SERVICES option
 This will take you to the API Library page. On the Library page, search for Compute Engine API in the search box.
 Click on Compute Engine API from the search results.
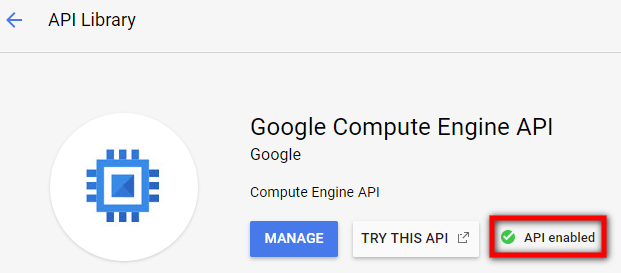
 On the Google Compute Engine API page, click ENABLE.
 You will see an API enabled confirmation box
2.3. Create service account
Open your project and click on the Products and services menu and navigate to IAM & admin > Service accounts
 On the Service accounts page click Create service account
 On the Create service account dialog box, set the following:
 A confirmation message will appear, informing you that your new service account and key have been created, and that the JSON file that contains your Private Key has been downloaded to your computer.
 Close the confirmation message. You will see your new Service account on the Service Accounts page

3. Import AWS into VM instances in compute engine GCP
Step 1:

Step 2:
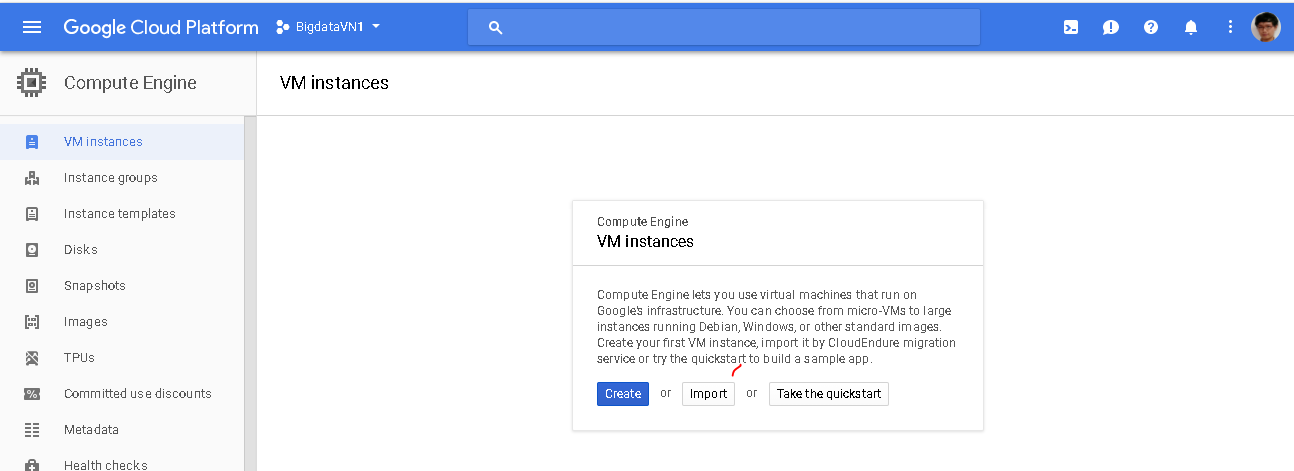
Step 3:
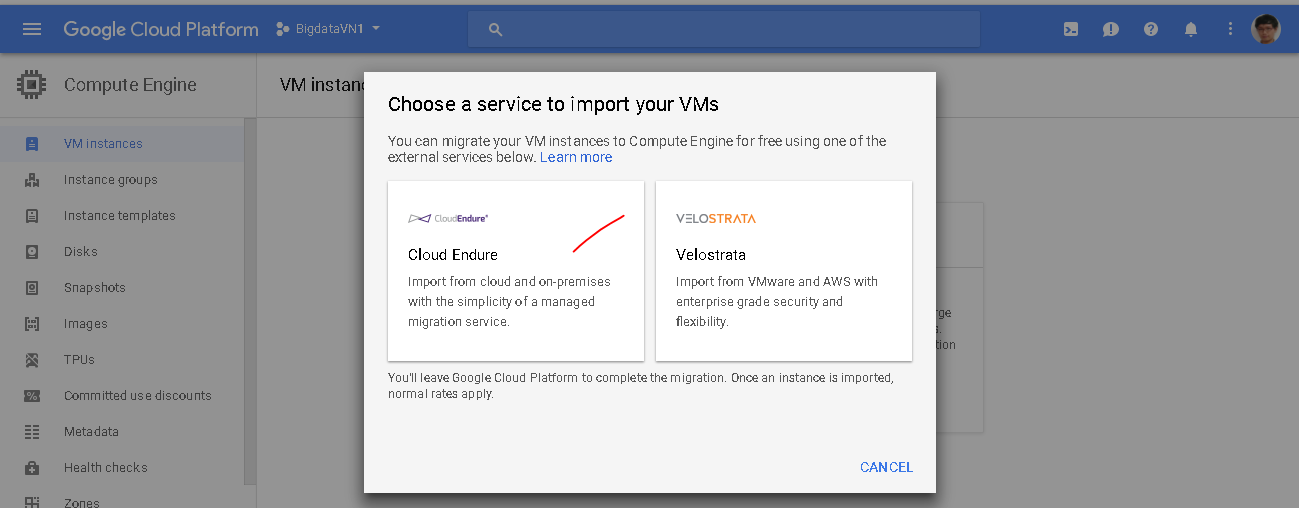
Step 4:
 Click here to choose file
 Browse to the location of your downloaded JSON file. Select your file and click Open
 Click save
Step 5:
Next to tab REPLICATION SETTING
 Click SAVE REPLICATION SETTING
Step 6:
Click MACHINE Categories to install cloudendure to AWS by Putty:
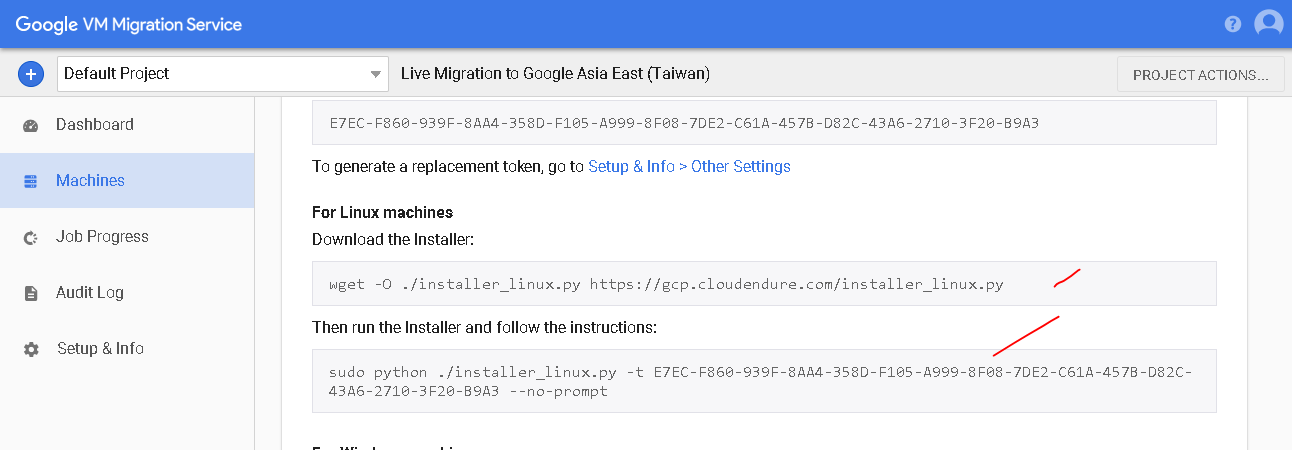
Step 7:
Install & config cloudendure in AWS by Putty:


4. Migrate Apache server from AWS to GCP
After installed & configed cloudendure in AWS by Putty, process download application in AWS to GCP happening:
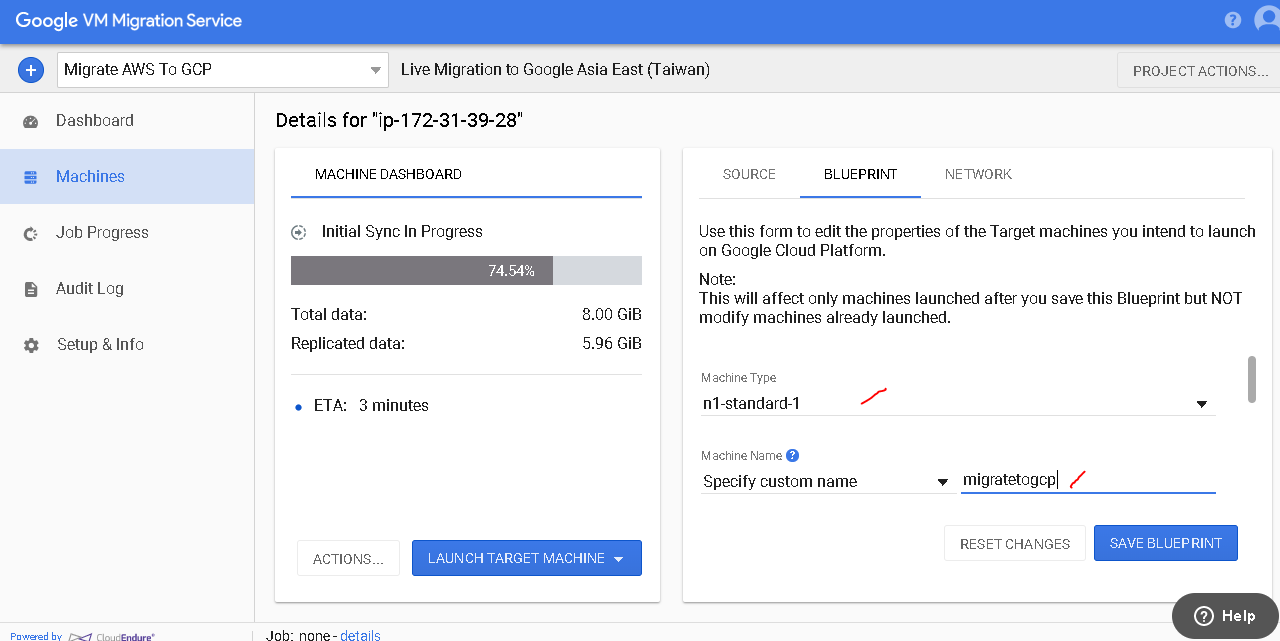
- In GCP, click into Machine name to config another for application:
![]()
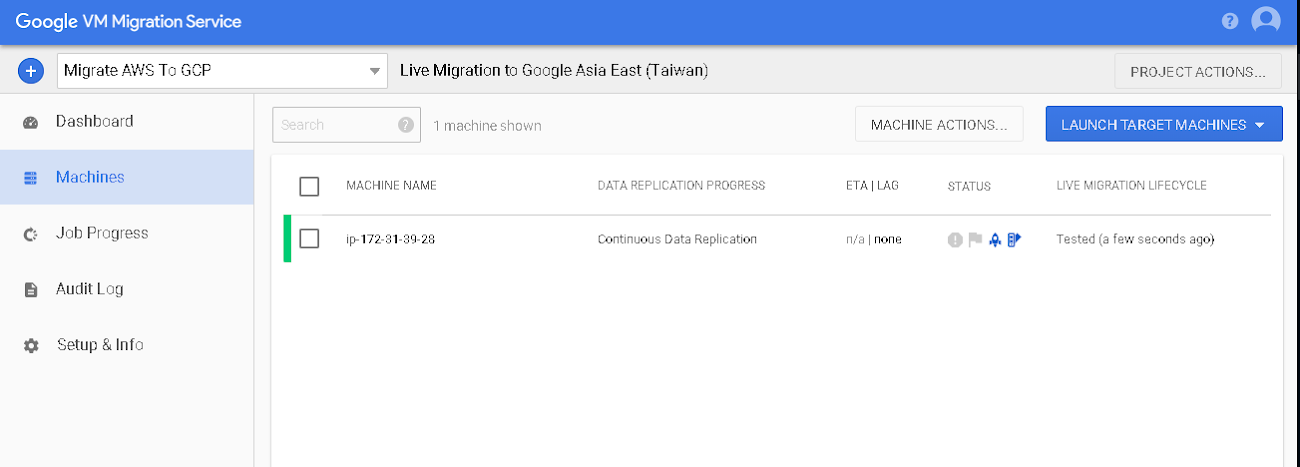
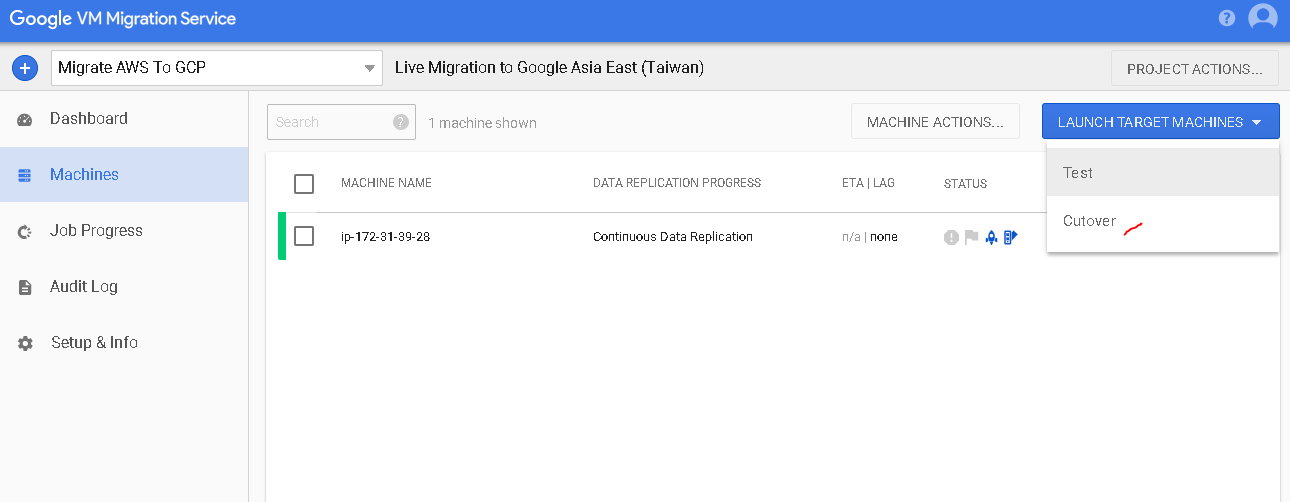
- Click into Lauch target machine -> choose test
![]() After tested, you can see green line.
After tested, you can see green line.
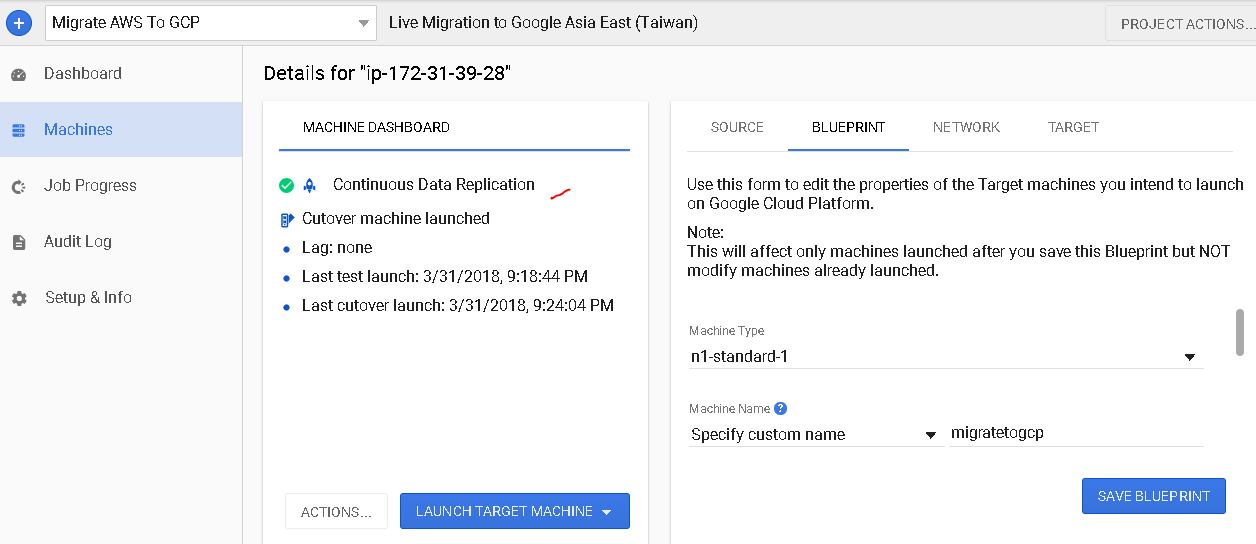
![]() Continous you clicking into Lauch target machine -> choose cut over
Continous you clicking into Lauch target machine -> choose cut over
![]() Click product & service menu -> choose compute engine -> choose vm instances, you see that 1 instances with name migratetogcp same that config name above
Click product & service menu -> choose compute engine -> choose vm instances, you see that 1 instances with name migratetogcp same that config name above
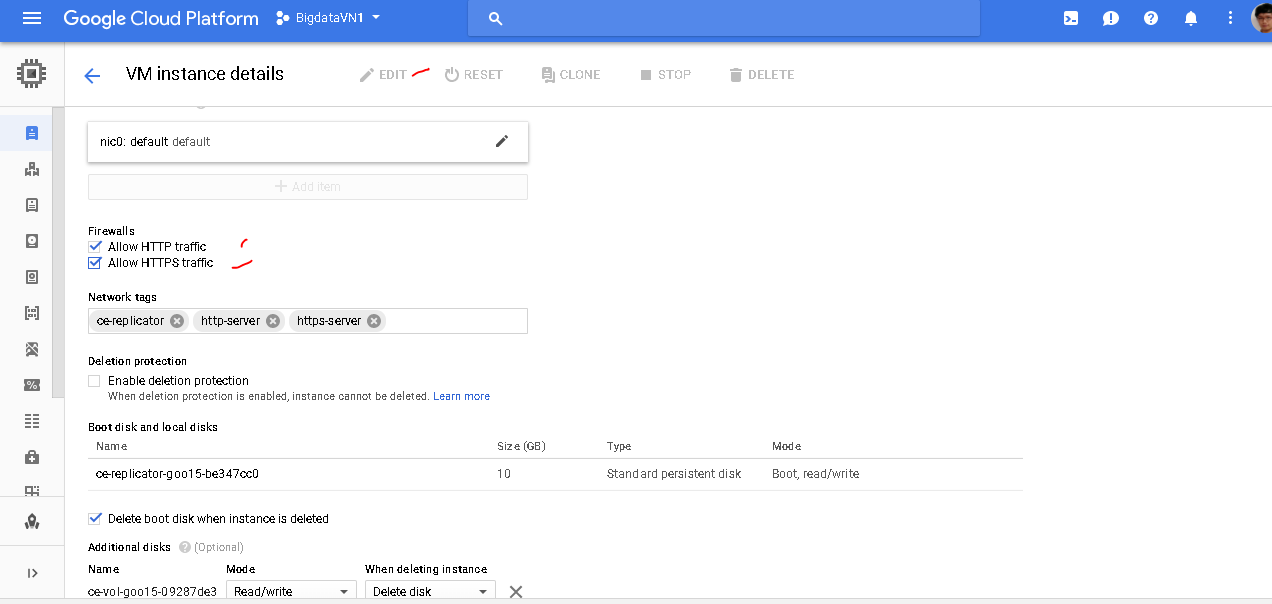
![]() Click migratetogcp, choose edit and config the following below:
Click migratetogcp, choose edit and config the following below:
![]() Save your VM instances
Save your VM instances
On browser, you type External IP of instances GCP to run apache server:
 So, we cloned apache server from AWS to GCP finished
5. References
- Google Cloud Platform Documentation: https://cloud.google.com/docs
- Migrating AWS instances to Google Cloud: https://cloud.google.com/migrate/compute-engine/docs/4.11/how-to/migrate-aws-to-gcp/migrating-aws-vms

